Full Thread Here
13 August 2008
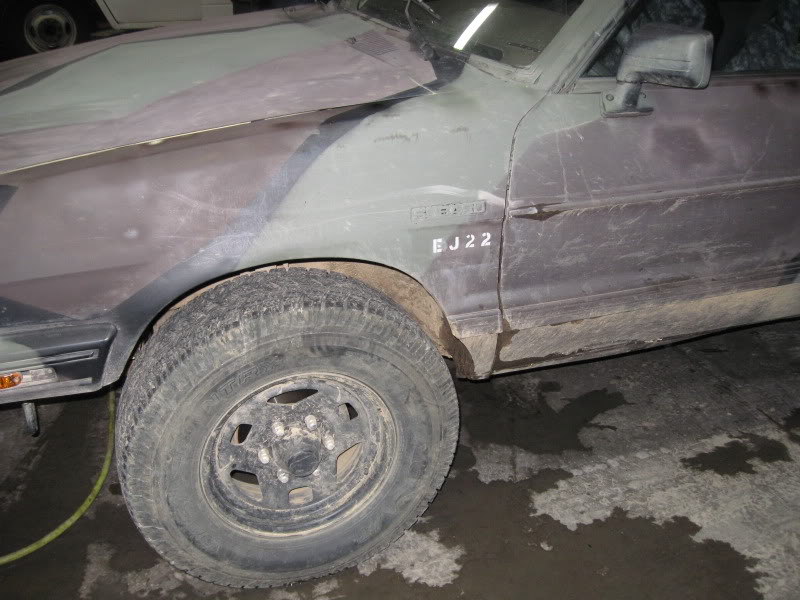
I picked up an ’84 hatch ,ea81 ,4spd , d/r for $250…
It needs an ign sw./clutch no biggie…
My plans….I got a free EJ22…
lift it w/ M/T’s
put my outback overhead rack on with lights..
rhinoline it.
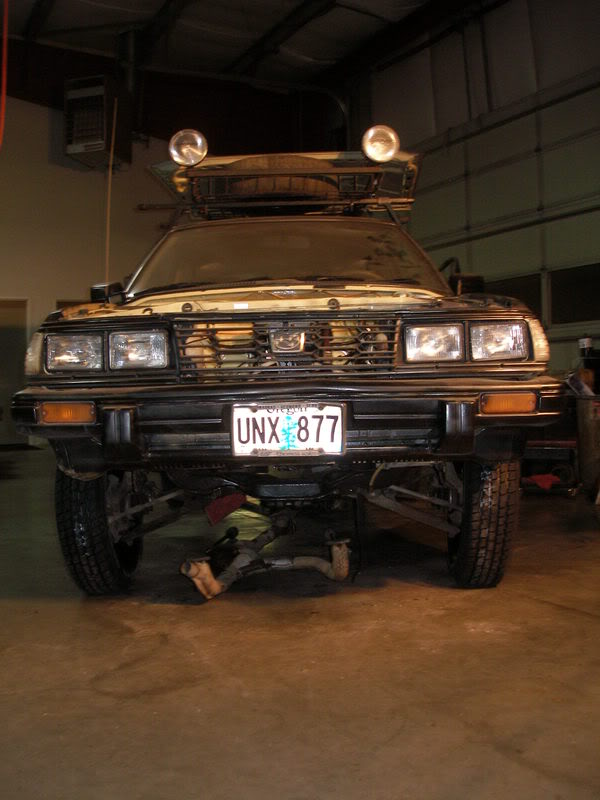
That’s kinda what I was thinkin’ …I might score some WRX seats for the front. Snorkel will be a must…& 4″ lift oughta do it…
18 August 2008
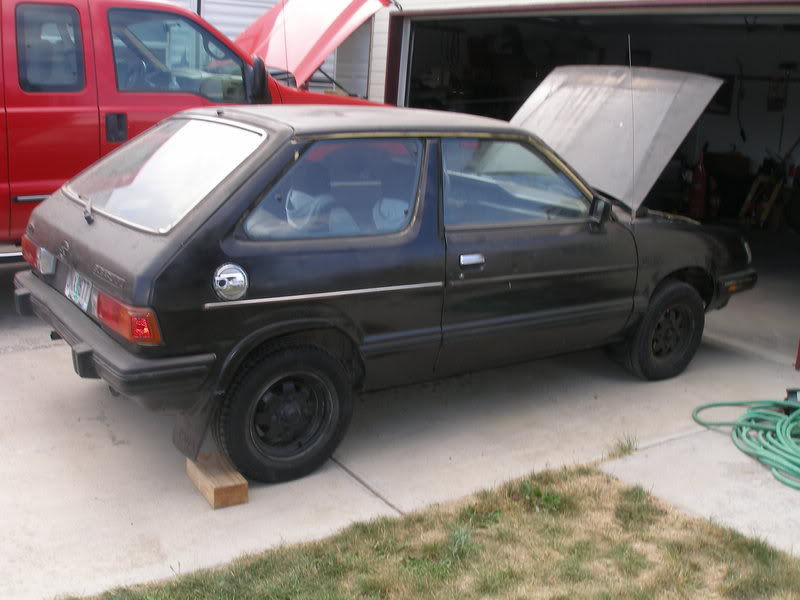
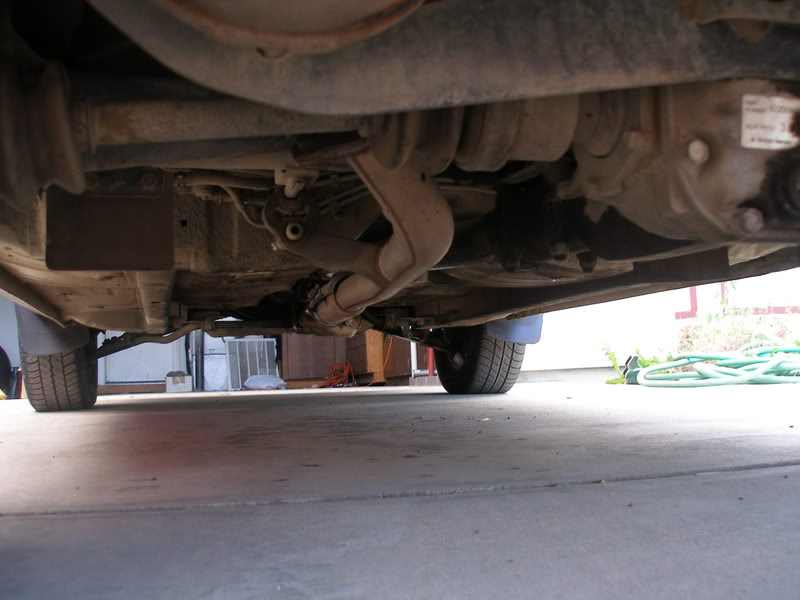
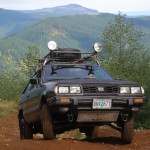
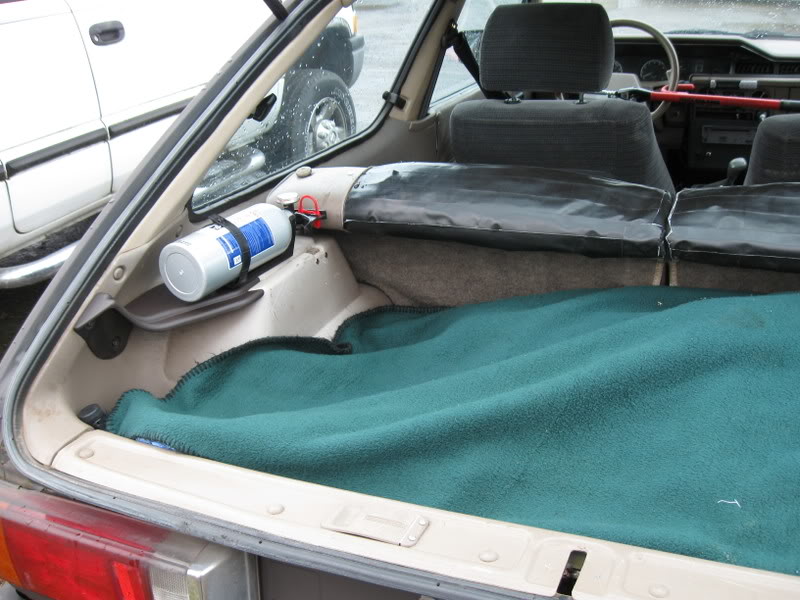
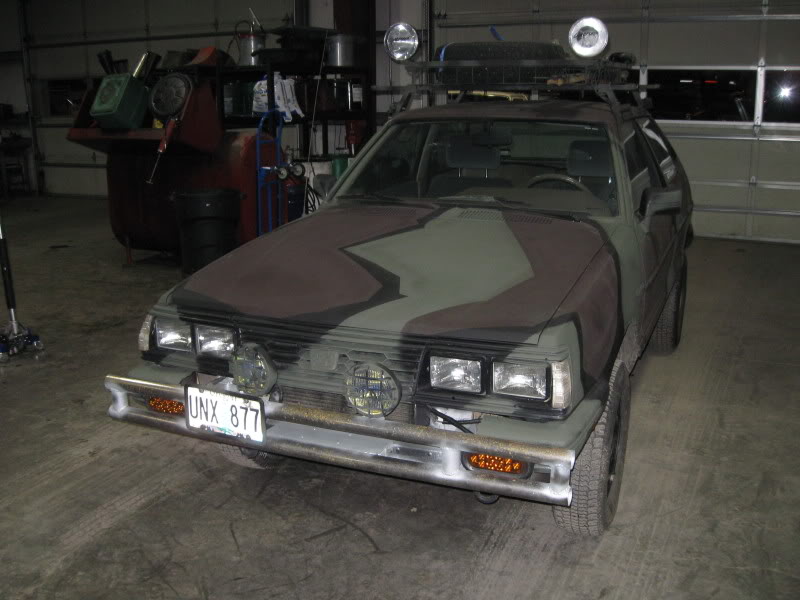
Here’s one for now…more to come….yes ..It’s virgin to offroad…the undercarriage is so clean…..
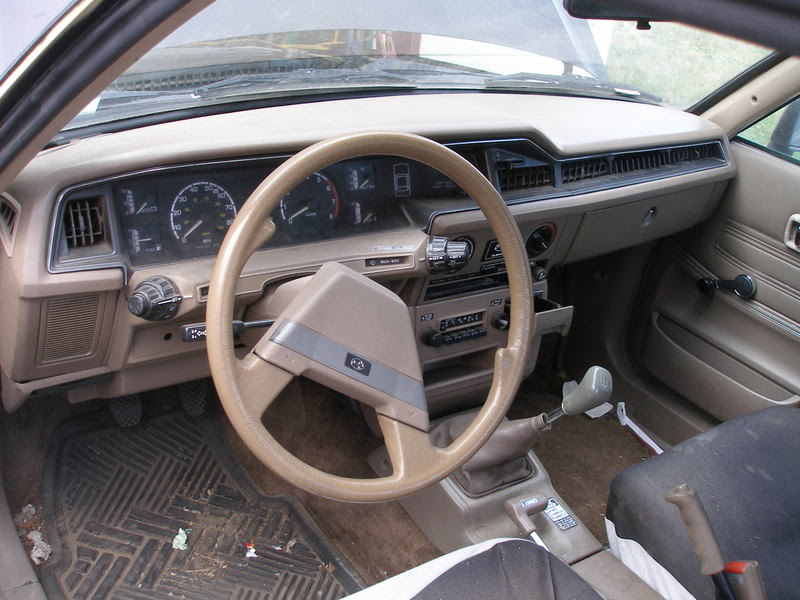
 It’s very straight inside and out.. the rear seats need a cover or just taken out..
looks like a dog had it’s way with it…
The motor is so clean and runs so smooth for 172k….not one oil, coolant or exhaust leak on her….I think I found a diamond in the rough….
I also won an ea/ej SJR adapter plate @ WCSS10…. not bad for $20 in raffle tickets!
I don’t have to paint it …it was yellow…now it’s wheeler black…

 Ithink Team CF’s wagon gave birth…his is an ’83…lol
It also needs a new blower motor….
Too boot it has good tags thu ’09……!
So my total investment is $270 add $80 for clutch and She’s ready to go….with the ea81…I’ll get the EJ22 ready..
27 August 2008
I went through the car last night and completly chking everything out.
I replaced the battery..it was toast:dead: $55
alternator charging @14v ok…
had the door locks rekeyed..as the owner lost them… $29
replaced fubar’d locking gas cap $11
Replaced missing rear hatch wiper
a few burned out bulbs ….
shop vac’d the interior… found some change..
ordered front brake hoses…cracking to the core..
psi chk’d cooling system …found a small leak @ radiator ..I can solder that..needs a flush and fresh coolant anyway…+10*
Hoses chk’d could use radiator hoses, heater hoses..
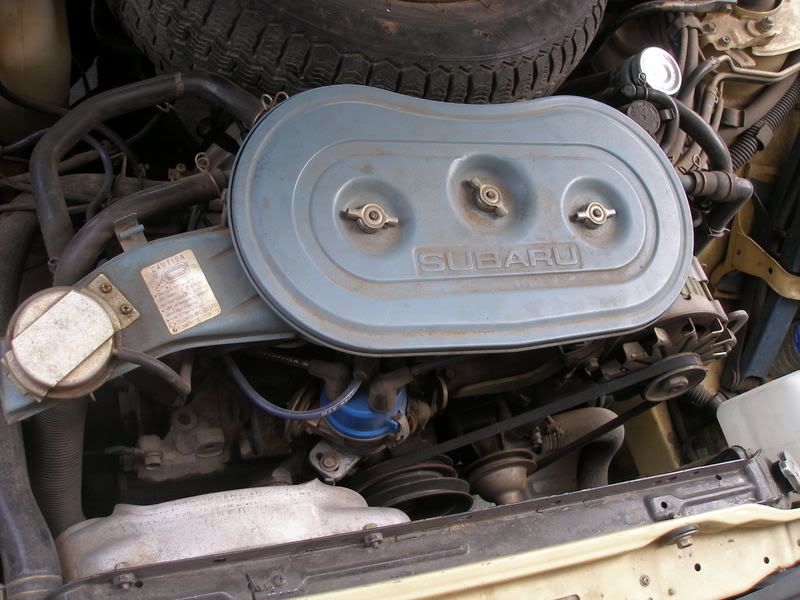
cleaned the carb/linkage runs a bit better now /choke works great..
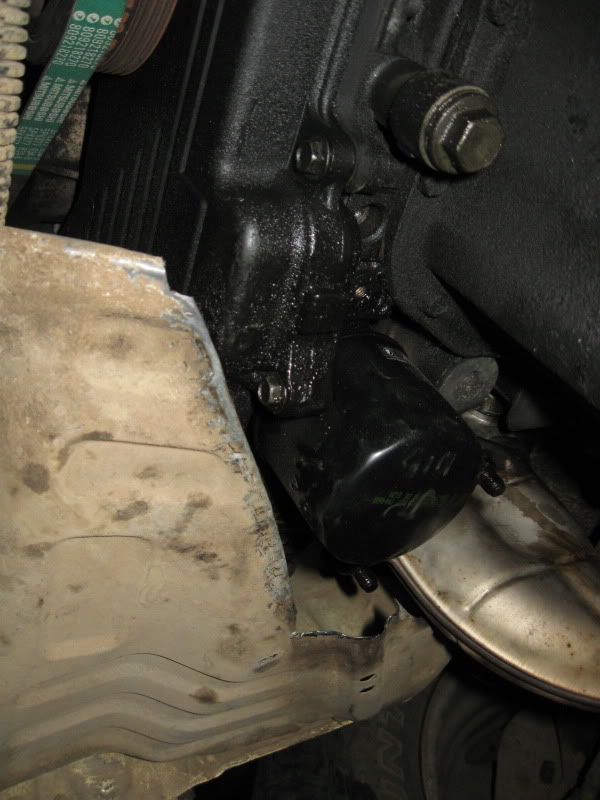
I did find some small oil leaks @ valve covers(loose bolts)+ oil pan gasket(loose bolts). I will reseal those when I pull the motor to do the clutch.
The motor runs great up to about 5k then not so great above that..needs a valve adjust…that’ll be done when the motor is pulled.
The only things that don’t work are the blower motor, am/fm radio…
Ign. switch is ok but I need to get it rekeyed…(owner lost key.. )
For now It is unbolted from the back side two screws.. a flathead screwdriver starts it up ok…
I’d rather have a key vs..toggle switch…keeps it nice….abit more secure unless they want it that bad…
I found a water leak from the rains here the left rear window seal… the latch doesn’t pull tight as it should.worn out seal/latch…so the out goes the carpeting…was gonna do that anyway….
I found it interesting comparing to my ’03 outback how much Subaru is basically the same…they still use the same fasters..and similar designs..just updated…pretty kewl…I found some loose connections for the am/fm radio….It works…
what do ya think the first song that came on …92fm kgon….?
“old time rock’ & roll”…by Bob Segar….so kewl ….the factory speakers sounds great for old skool….
I also tore apart the blower motor…one of the brushes was just gone….dissintegrated…to dust…I hope to find another soon…
1 September 2008
well ..I guess I got some labor done today…
Removed both front brake hoses only to find the replacements were too short….
 My original hoses were 20″ from end to end the raybestos hoses were 19″..
I made some calls to napa, schucks, autozone ..surfed the web..(rockauto.com)
Napa, schucks had 19″ hoses..
autozone had 19.5″ hoses:dead:
Rockauto no info….but good deals on hoses…:-\
I just capped off the hardlines and calipers so they won’t leak …
The hoses were cracking to the core…not safe in my book unless they are spares in jam…
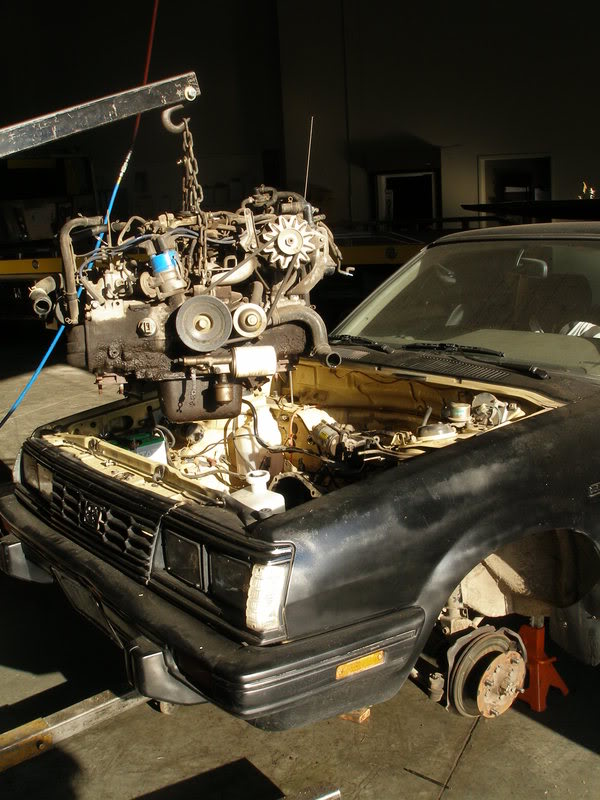
Oh yeah …I pulled the motor for a complete reseal and clutch…this has to be the simplest motor pull I’ve ever done in two hours…that includes draining oil, coolant, pulling radiator,clutch assembly….bet I could do it in an hour. ..next time..
I did find a right front inside CV boot torn…no biggie..
I didn’t even use air tools…
3 September 2008
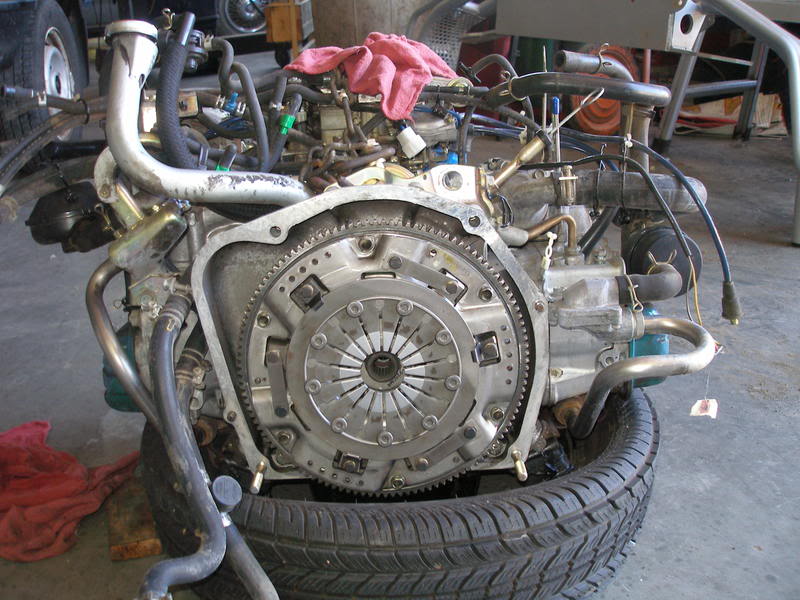
I surfaced the flywheel replaced the pilot, release bearings . I had to weld in the wear spots from the clutch fork on the release bearing housing ears.
I order my parts : rear main seal, 180*thermistat, headgasket kit, ,oil pan gaskets,hatchback struts…
6 September 2008
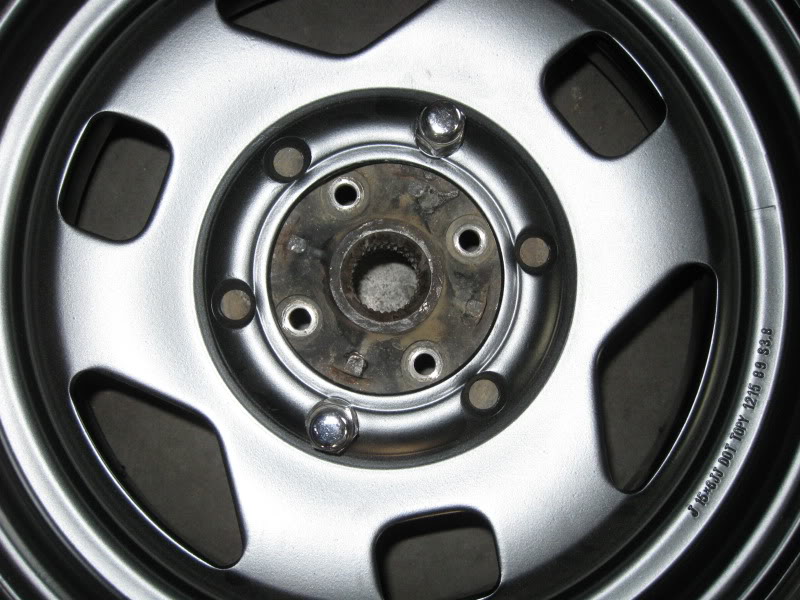
I went to u-pullit today and scored a set of 14″ pug steelies w/tires!!!
also a good blower motor..and some hatch struts for team cf…
15 September 2008
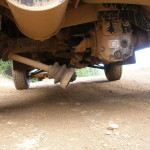
since the site was down , I welded the rear diff. installed blower motor, replaced oil pan gasket, thermistat, hatch struts, front swaybar removal for max. articlutation, CV boot. SJR 4″lift is on it’s way..
18 September 2008
I got two pugs sandblasted/primed for black paint
Dropped off two wheels to tire shop for a set of cooper weathermaster snows for now….I can’t choke on swampers yet…

 CB swap from my outback in progress…I ran the antenna wire around the hatch and in thru one of the lic. plate lamp holes..nice and clean…
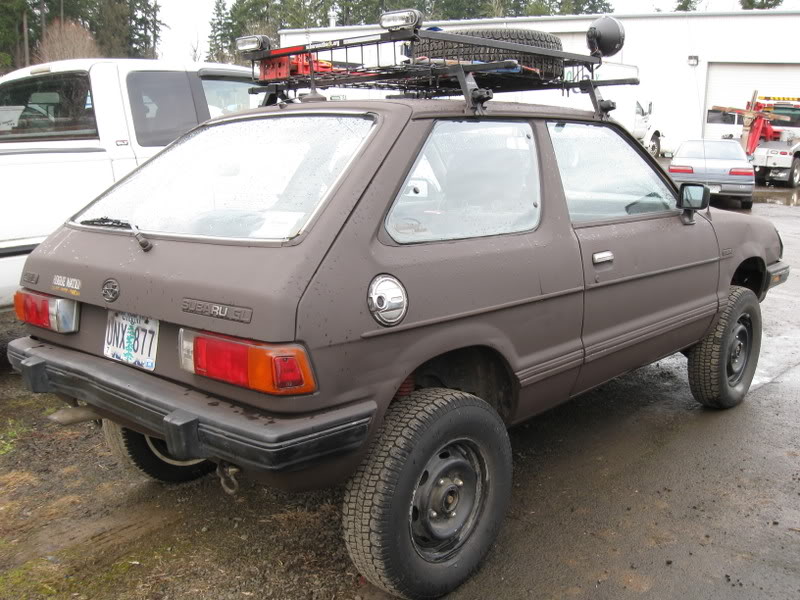
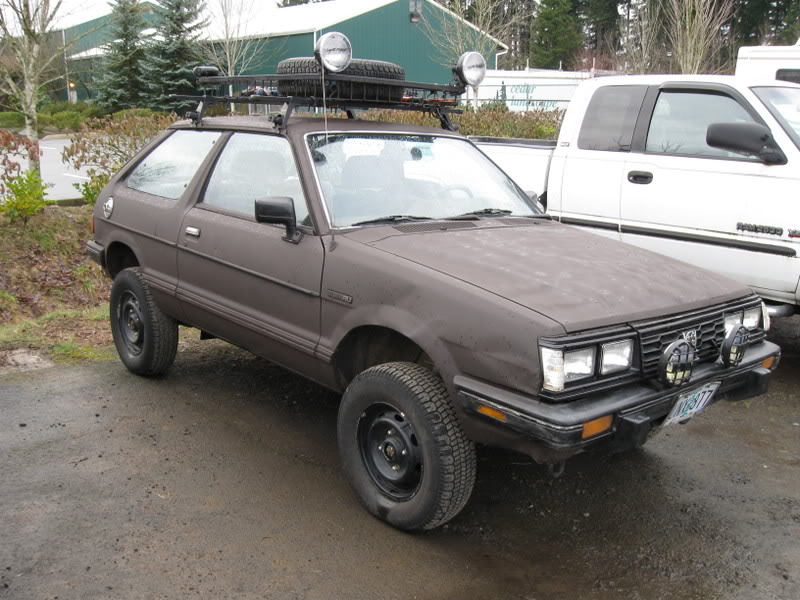
I also scored a set of 53″ x-bars w/ barcraffters raingutter mounts/w locks for $60…(the thule mounts are $140 + another $50 for x-bars )so my outback overhead rack with lightforce rmdl 170s, hella ff75(backup lamps) will bolt right on…just have to wire it in..
Here’s just a few pics…for now with new pugs, hatch struts(open hatch stays up), clean eng. bay, new clutch kit…
19 September 2008
I did get my overhead rack(from my outback) on yesterday and painted two of the pugs semi-gloss black(new treads A pair of cooper weathermaster stII studless snows) .
So much to do… so little time…After I get her running I’ll start workin’ on the EJ22 swap and 5spd…
22 September 2008
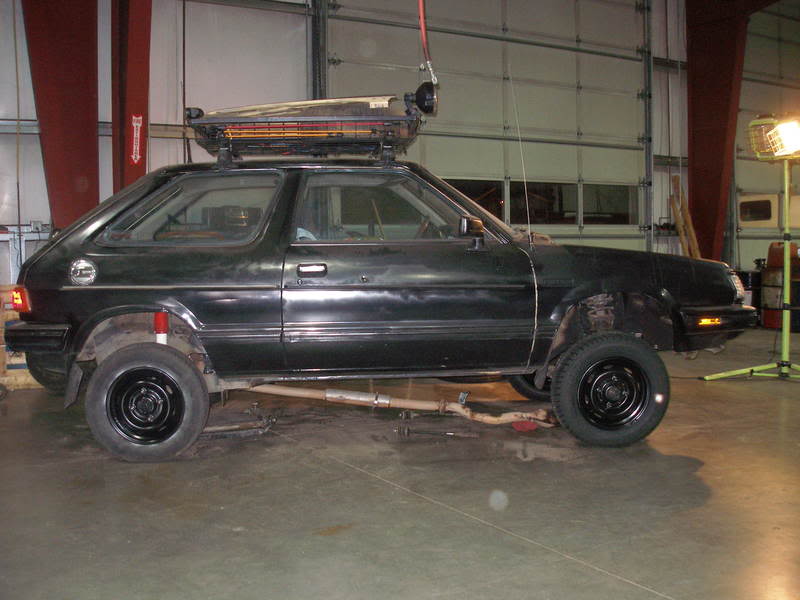
Ok it’s official ..my hatch is lifted..thx to SJR for the lift…and Teamcf for the install help..!
I used the SJR 4″ lift (ea81), rear shocks (rancho RS5241). It’s off the ground .
However, I still have to finish the radius /trans mounts/shift linkage/steering linkage, brake hoses lengthened.
I did find a “pug” spare at upullit today $19 (my core tires/blower motor paid for it…It’s from the same Pugeot I got the others from..
I also found a set of 2 snow tires on honda rims for $40 on craigslist Friday..that are old school meats…w/ a few studs…they looks like A/t’s( Toyo rally & snow) 185/70/R14’s… ok so they are small …but my funds are low..I’ll get these mounted on the rear…That welded diff. will dig in….!
I took a pic of the tires plus the other set I purchased(Cooper weathermaster STII’s studless (which are mounted on the fronts)
They are the same profile…. the tread pattern is different..
So if I ran the current snows up front and the regular radial tires in the back…how would that affect the Trans.. Note: the studded snows aren’t mounted yet..
24 September 2008
I got the radius blocks in…
Tommorrow I get my brake lines..
Also steering shaft will be lenghtened
All that is left is D/R linkage(tires…install motor/rad..)
Then I can wheel it:banana:
26 September 2008
It’s gonna be close…The D/R shifter linkage , front brake hoses, stuff the Ea81 in, radiator, rad hoses, misc. hoses.., Ign switch., wire in /mount CB.
OHV permit…
29 September 2008
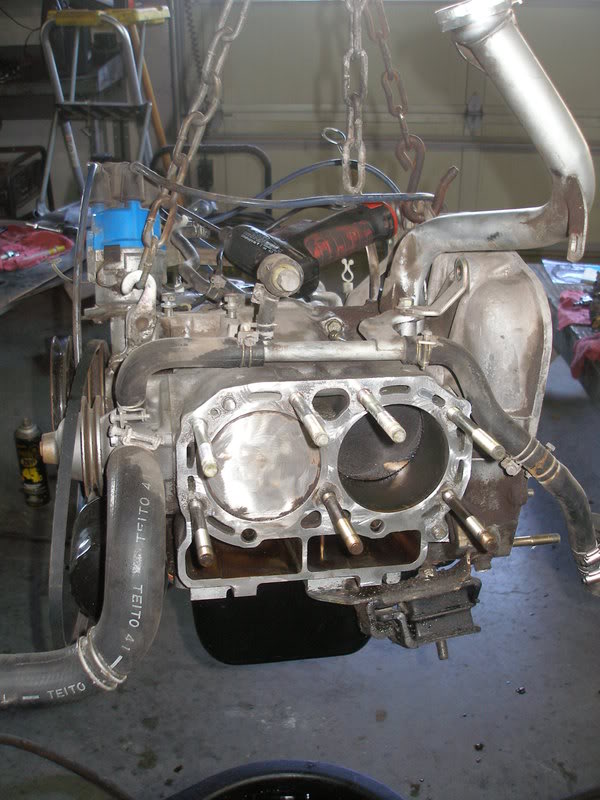
Sunday I replaced the headgaskets,valve covergaskets, intake gasket, stuffed the ea81 back in…a few hoses, radiator and shift linkage…it’ll bee done to wheel it…
30 September 2008
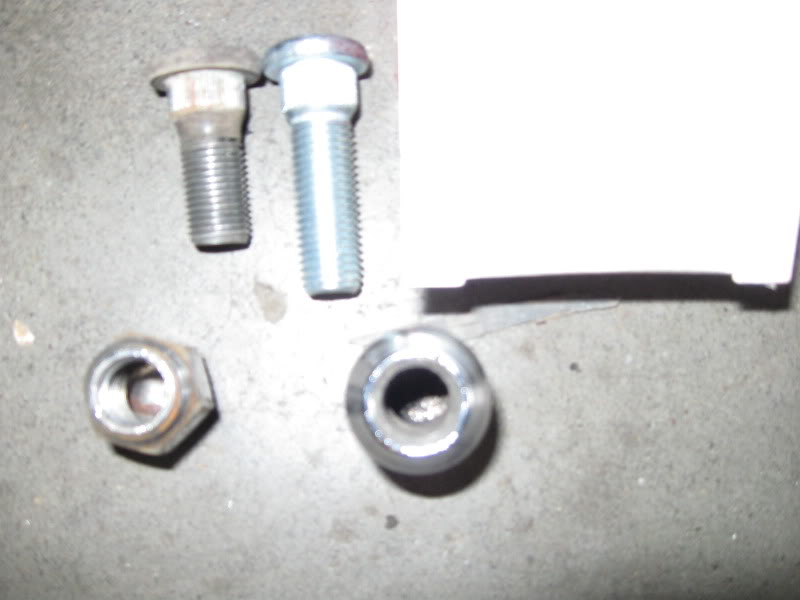
Here’s a pic of the ea81 block as you can see the one cyl. headgasket was going…Note : the clean area in the carbon(right side)on top of the piston.( I had already started prepping it the block..)
and of course the motor installed.

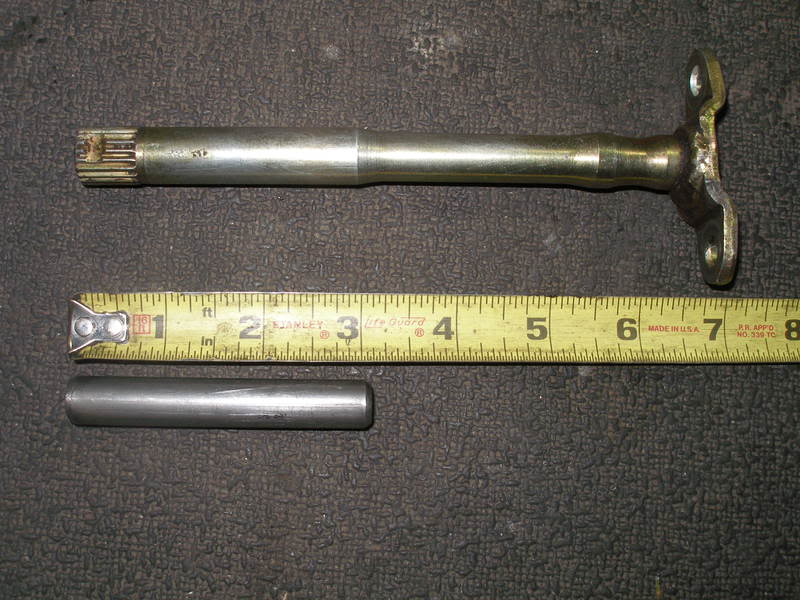
Here’s the steering shaft modified 3 3/32″ longer(welded w/ 1/2″ steel rod) and painted with a zinc coating
 16 November 2008
I ditched the Hitachi that was giving me issues (worn throttle shaft bushings).
I found almost new Weber 32/36 DGEV w/elec. choke w/75miles that was on a 22R toy powered sand rail for $175. I purchased an adapter plate $39 / rejetted to Subaru EA81 spec.
Primary/secondary
Main jets 140/140
Air correction jets 170/160
Idle jets 50/50
I eliminated all the smog stuff as they don’t test deq here…otherwise a weber 32/34 dft(smog legal carb ) would work fine…I had one years ago on my Chev luv 1.8l Isuzu it ran great!
I took the old right side air cleaner mount and cut it just above the plug wire holder and welded the stock throttle cable bracket to the appropiate height and bolted it down in the stock location of the original mount.
I used the old Hitachi throttle linkage and tack welded it to the offsetted weber linkgage(clears the choke lever). For my throttle return spring I used the stock Hitachi spring and attached it to a ziptie wrapped around the weber(see pic).
After abit of tunning she runs like a rocket and sucks you back in the seat in 1st/2nd/3rd gear…
16 November 2008
The previous owner I bought the car from said the guy he purchased it from was abit more portly than myself say 400lbs..so the drivers seat was broken down..much to my suprise the mounts and towers too…!
So it was time to upgrade..I was trolling the local u-pullit and found a nice pair of ’98 outback seats in grey cloth $48 pair . I also nabbed the seat belts from a ’95 impreza .
First the mounts on the drivers side had to be reconstructed..so I cut/fabbed and welded them. The left rear tower was completely unsafe…! I later cut /fabbed & welded the outback seat brackets to refit to the ea81 chassis mounts.
I first set the seats in just to see how much I need to cut off as the outback seats mounts are taller..I’m 6′ so I used the drinking method..(how many fingers)lol..
Stock ea81 seats I have 4fingers horizontally from the top of my head to the roof(safe) . The outback seats in (just set in place no mods yet) I had 2fingers clearance…being a wheeler & I didn’t need the headaches..
After a couple hours of cut/fab/welding I got the seats in and I also had to trim the plastic inner sill cover(seat side) to fit the seats in also the drivers side hatch lever/cover abit. It’s a tight fit but works great.
The seat belts I had to retro fit (impreza belts) by reversing the mount postion(belt/barrel assembly) and welding two pieces of 1/8″ flatbar for setback and length & then drilling a hole for the mount. They tuck nicely inside the frame pockets.
I will post more detailed pics of this later..
here’s a pic of the seats mounted with reconstruction..I also steam cleaned them so they look almost new..
I have some safety and comfort now…
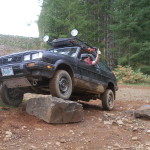
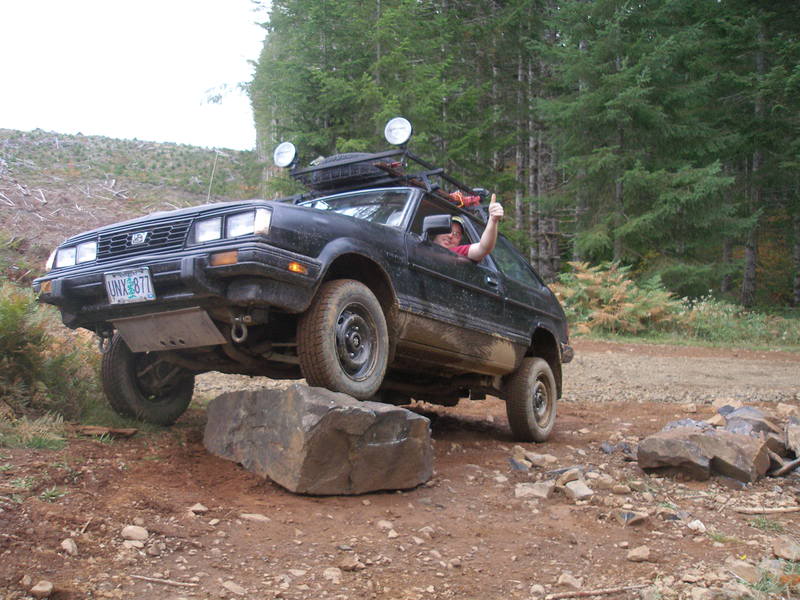
After all the work done it was time to take the virgin hatch out wheelin’..A nice cruise out to TSF(Tillamook state Forest) we hit some trails..
The hatch performed flawlessly all day…
I was happy until we got to the infamous hill that took out Chaz’s diff..!
I cleaned it the first time no problem..I did the second time with a bad line..and too much throttle ..{{{bang}} the left rear axle inner cup exploded..DOH!No biggie I removed the axle and we wheeled all day after that…
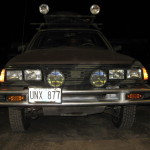
I also found some PIAA 520 fogs I mounted on the bumper. They were $60 like new from craigslist. They were chrome so I painted the covers with some black plastic paint I had.
 1 January 2009

I’ve been busy over the holidays…my camera finally died so I got a new one…
I got an Accel supercoil for $25…fabbed a custom bracket plus some new Accel wires, Ngk plugs and fuel filters changed..
The am/fm stock radio was killing me after awhile…I hunted on Craigslist and found a used Premier cd/radio for $35 and new 5.25″ 3-wayspeakers $20 for the rear( I used the side pockets in the rear ) Abit of plywood/cutout,speaker fabric and some self drilling screws to mount them. 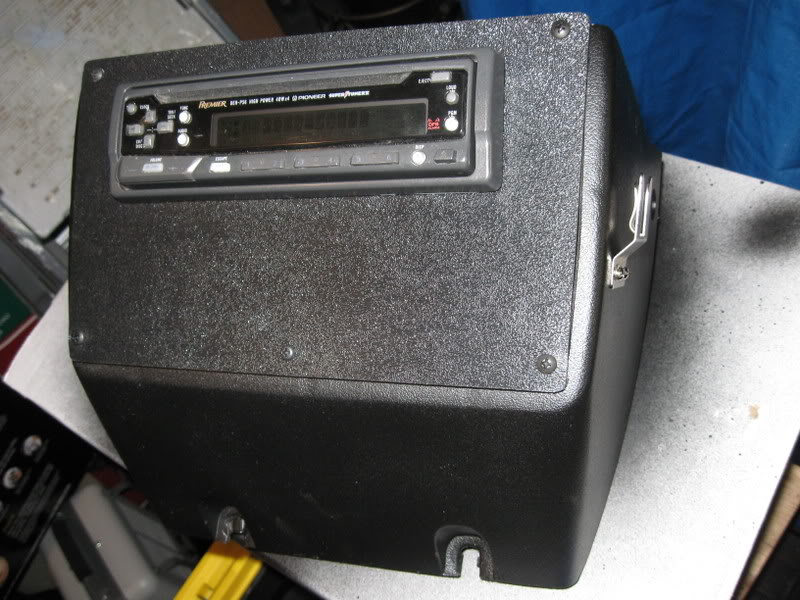
The front speakers I used a 3.5″ coaxials for $9.95 via the net in the stock locations..with minor modification to mount.
The slant radio console I cutout the am/fm radio slot to fit the new headunit in place . I went to tap plastics and bought some scrap and had them cut it out for me and I mounted via screws over the old fascia.
I then decided to use up some black plastic paint I had and paint the console to match the new fascia..
The Gm 100amp alt conversion is next…
21 January 2009
I needed abit more juice to run lights & accessories..
We had one in the shop “freebe”:banana:
So I modified the bracketry to fit the monster gm alternator.
Abit of cutting /welding or the stock bracket and adjustment arm spacing(welding in shims of about 3/4″). as stock bracket are easy to find in upullit.
I used a napa belt Pn# 25-1365
The car idles and runs better overall and lights are brighter..single best upgrade yet …
2 March 2009
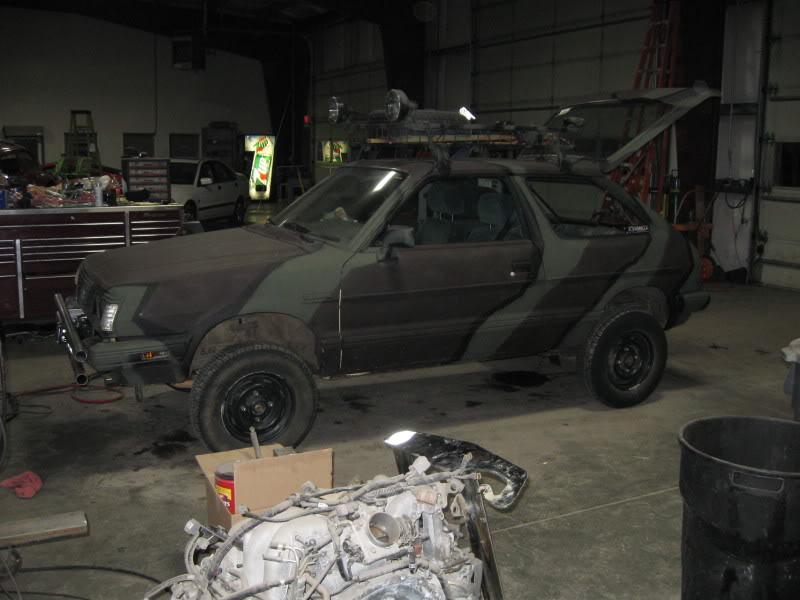
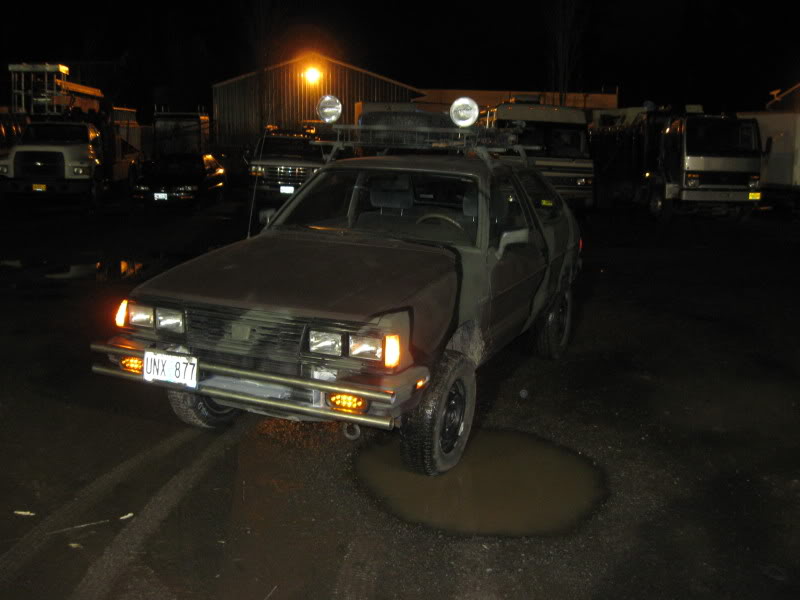
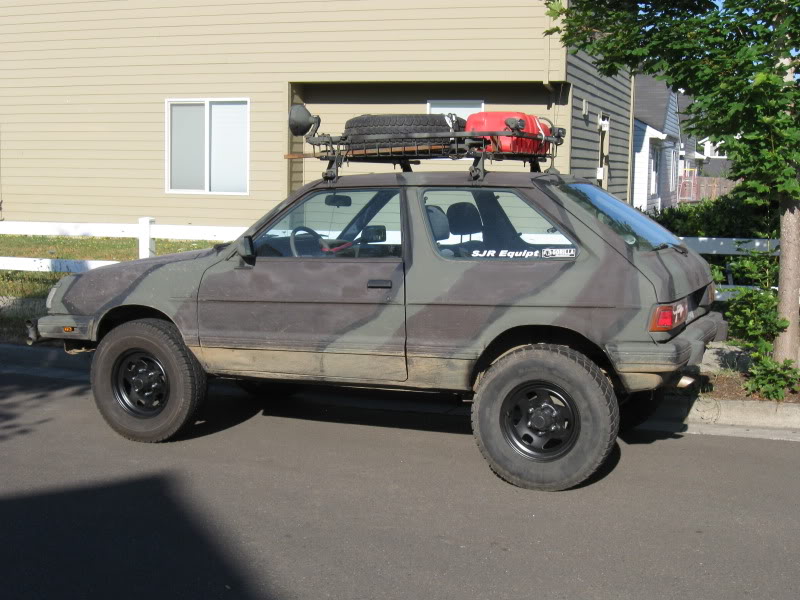
I was growing tired of black so…I found some cheap camo paint rustoleum earth for $3.89 a can….three and half cans later my I had a new hatch paint scheme…for now..
I also removed the rear flares..
3 March 2009
Overspray….really the only overspray was on the bumpers ..
If you read the earlier post about a custom bumper for the winch those bumpers won’t be there..(besides both bumpers are banged up . So abit of overspary ain’t gonna hurt em..there are so many dings on this car if anything the camo blends it in bettter..
It’s not a show car and if it is it’ll have a large spattering of mud…
I plan on doing more green/khaki in the paint scheme..
This summer I might do the body work and paint..we’ll see..
24 March 2009
I’ve been busy upgrading much needed compenents of the hatch..
A rear mounted fire extinguisher in the hatch and power port for compessor, etc… 
I dreaded the black hole when I opened the hatch at night so I added a six LED light mounted on the hatch and it is so bright..the pic below is stand alone with no flash from the camera..! 
Next I had started onthe camo paint..abit of green/black..I need to finish..but you get the idea…
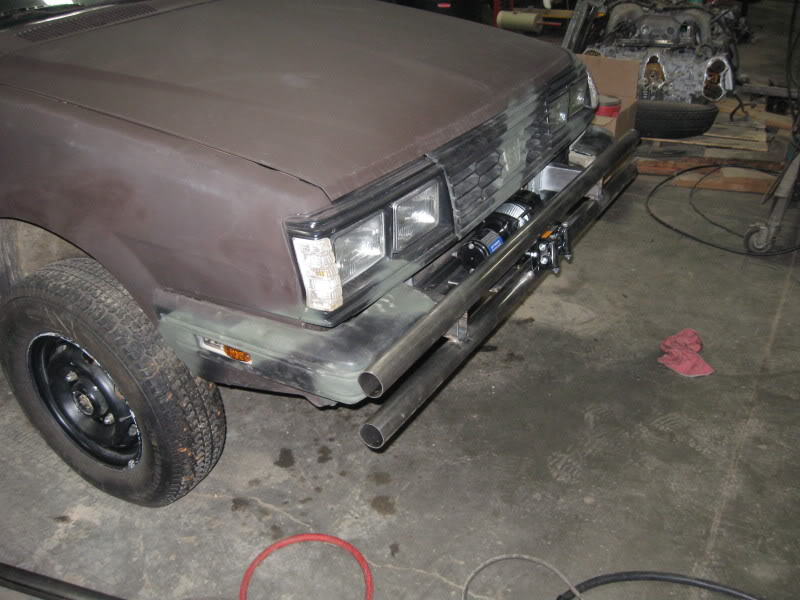
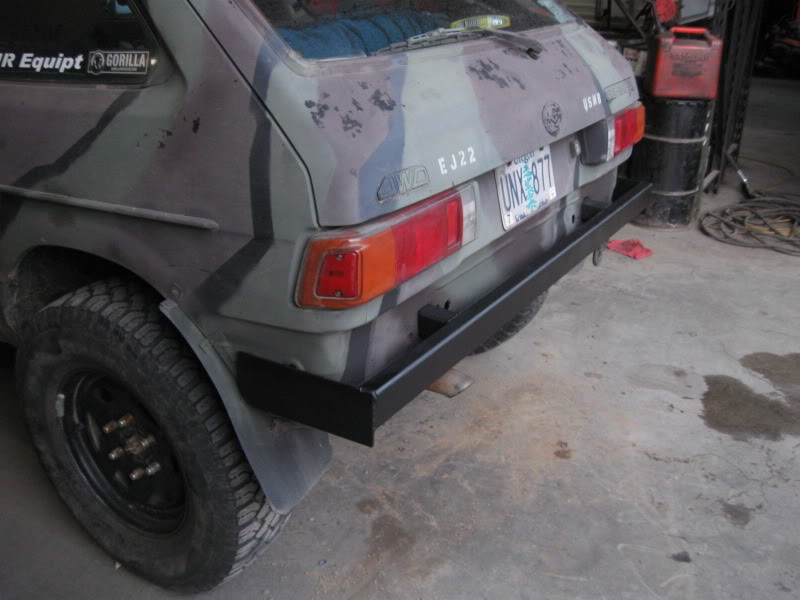
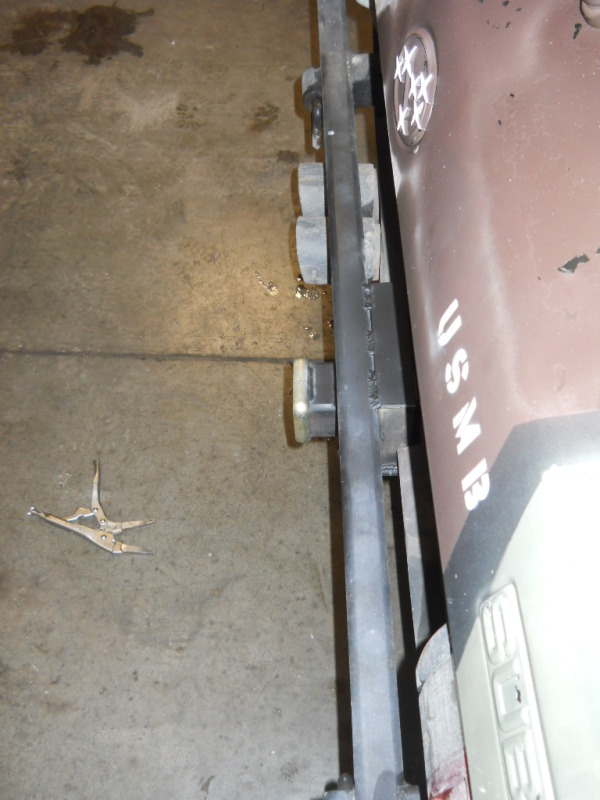
I had purchased a 3,500lb winch and needed to fab a bumper
so here is some progress…I used thin walled tubing .065″ and some other peices..it’s very light but strong…!
I used the corners of the factory bumper to fill in the big gap left at the ends…Then mounted LED marker and turn signal lamps.. 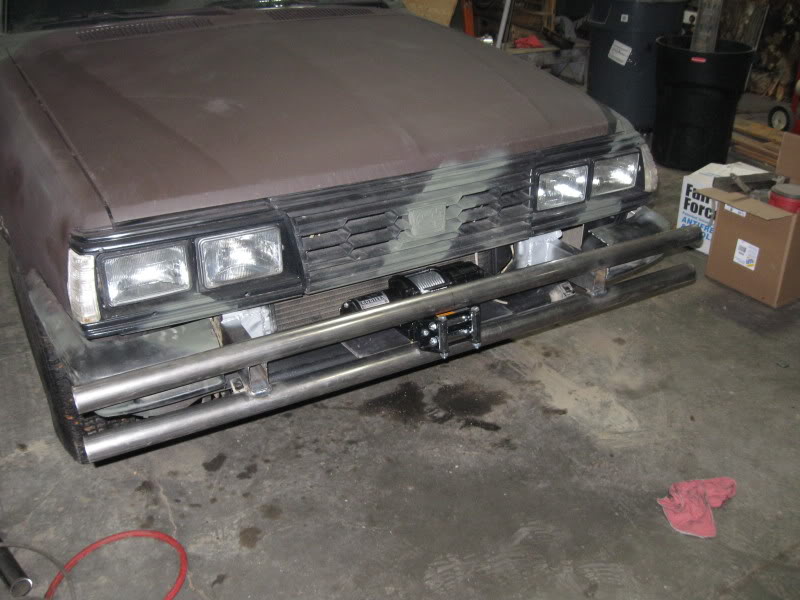

25 March 2009
I welded up my fog light tabs and mounted them up.. I still have lots of bracing/welding to do before the winch goes back on..\
Too boot… I’m driving the hatch all week..Gotta get those studs removed(or what’s left of them..lol)
 2 April 2009
I’m almost done with the camo the roof is the only part left..
Abit more braces welded in the bumper…
I had abit of a setback the night before when my rear u-joint was coming apart.. …lucky I didn’t drop the driveline….whew..!
So I changed both U-joints.. 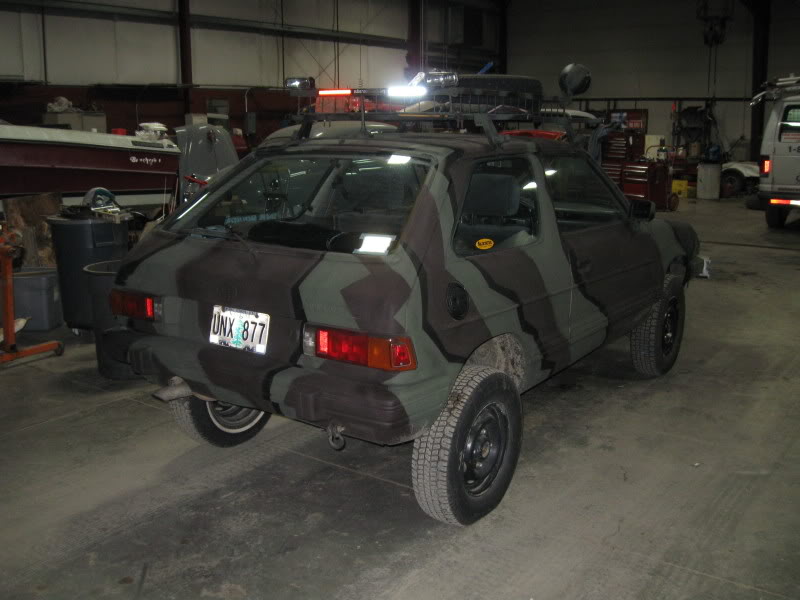
17 April 2009
here’s a few pics of the door panels, sills, apillar, fuse panel cover,..etc.. 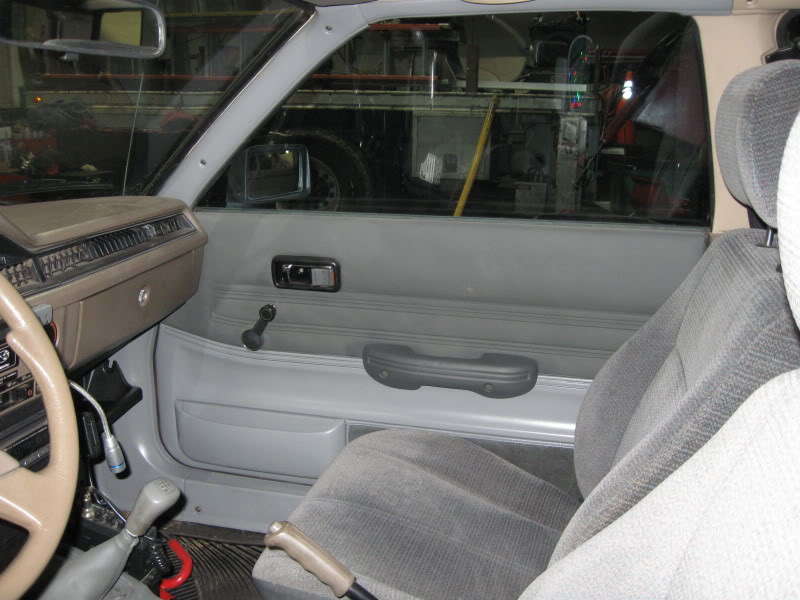

20 April 2009
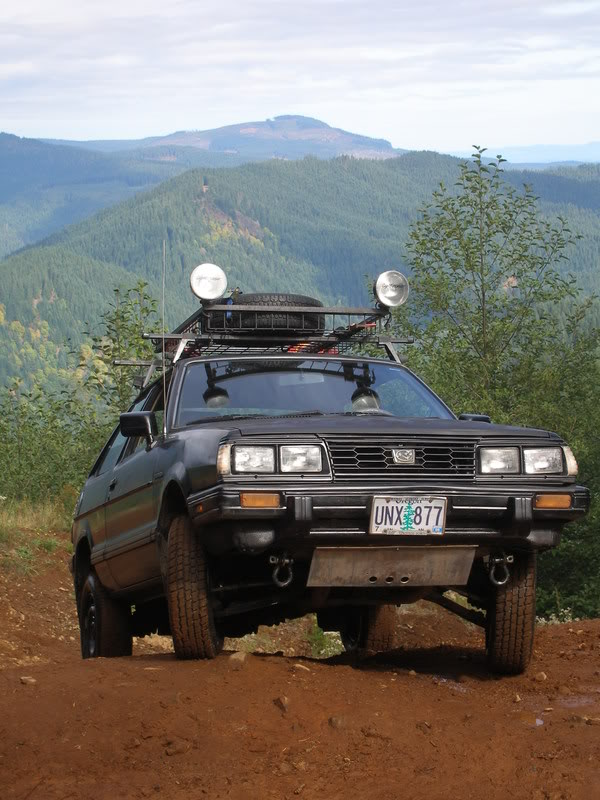
I took this shot when we were up at the The slab…
Think the camo paint in this area was perfect… 
17 July 2009
I found some 6lug Isuzu wheels and painted them black. A redilling of the hubs was fun…I fitted the wheels with some free wild country rvt A/T that were from a scapped van in our shop yard They were like new..
235/75/15 (28.9″dia) . abit of fender trimming firewall bashing.. 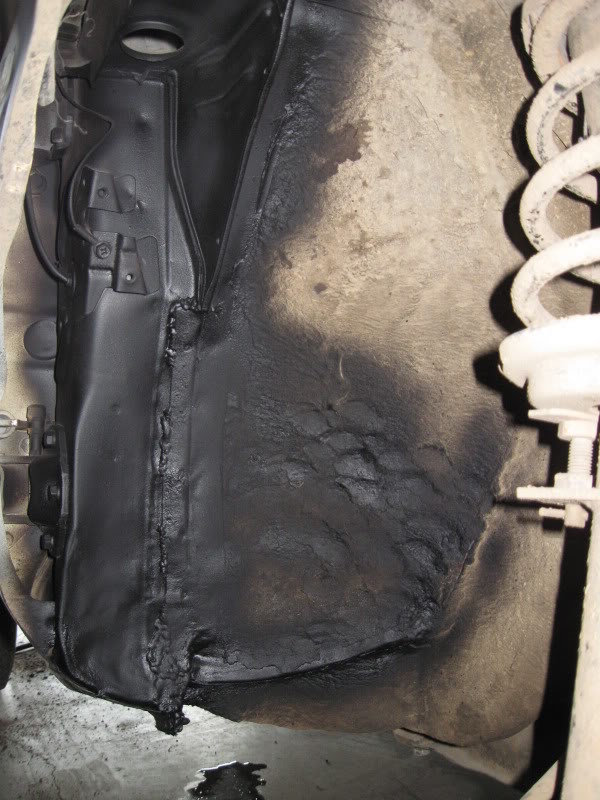

2 August 2009
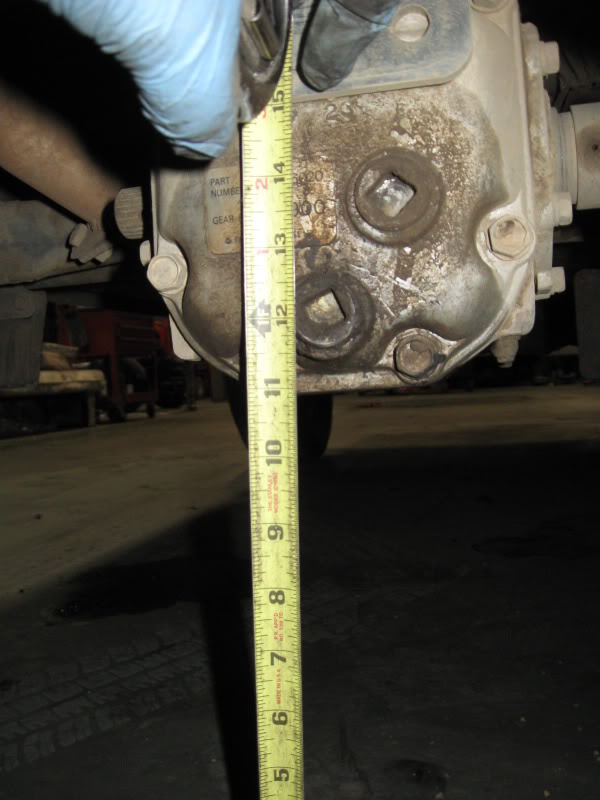
I was at u pullit and found an 86 RX..So I promptly took the LSD out and rear disc brakes…
I will have to convert the LSD to a 3.9 as it is a 3.7 ratio..
9 August 2009
I swapped my 5psd trans today…just the driveline left and console..
It drives great in 2wd…smooth shifts…no shot syncros… and reverse doesn’t grind….
I don’t like the starter setup ..so I’ll get an ea82 starter so it works properly…
I need to rewire the sensors for the ea81 harness(hi/lo range) to the ea82 harness.
Tommorrow the rear disc swap goes in …had to order rear brake hoses to the calipers..upullit cut them.. …
I’ll post pics soon..
14 August 2009
the 5spd is in and my driveline will be done sat.
I cut the two trans. mounts up and welded the two together to work with ea81 to ea82 mounts. It looks factory..
The rear disc swap is done..except for redilling the hubs to 6lug .
I rewired the 5spd by using both harnesses to have a factory look and function..all my indicator lights work..
I just need to finish up the console with a ea82 to fit the ea81.
I swapped the rear diff . to open and two rear axles…mine were DOA..
18 August 2009
I finished the shifter console, carrier bearing mounts, rear driveline resized,
rear disc. hubs redrilled to 6 lug.
I might actually have time to do my LSD swap…
Gotta finish my bumper welding/winch wiring….so much to do before the WCSS…
I think it’s kinda funny …I purchased my hatch one week before last years show…it wasn’t even driveable…
27 August 2009
got my lsd fix.. it’s in..testing begins backroads /trials enroute WCSS..
16 October 2009
since, my original free ej22 deal fell thru last year …
I found another donor for $200
A ’90 legacy sedan (bpillar wrecked/trans diff)…the motor has 165k runs like a champ, no leaks…
So tommorrow I pull the ej22, harness, ecu..misc. goodies..
Just need an xt6 pressure plate,I have my sjr ej adapter plate.
A flywheel redrill .
My hatch will have some more umph to turn those bigger tires.
22 October 2009
my donor ’90 legacy sedan . I removed the ej22, harness,ecu… 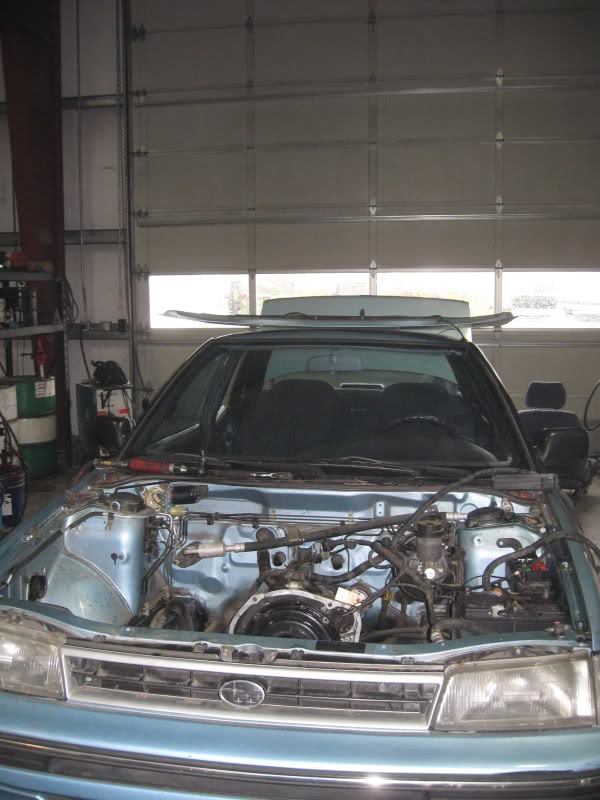


28 October 2009
The trans was ok the front diff. was toast.. ring/pinion..
at least the heart of the legacy 2.2l will live on….
1 November 2009
Yesterday I pulled the Ea81 out and sold it..
after removing the Ea81 the motor mounts came off in peices…it was good timing..!
No looking back now..
here’s a pic…of the extracation…note the EJ22 in the background..awaiting it’s new home… 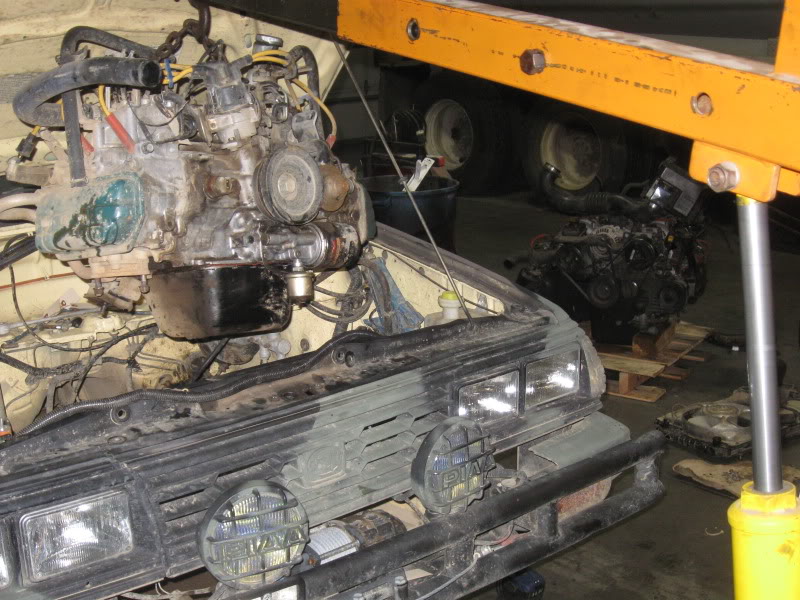
2 November 2009
It’s a 3,500lb Gorilla I got for $125..I still need to finish wiring it up just been too busy…
14 November 2009
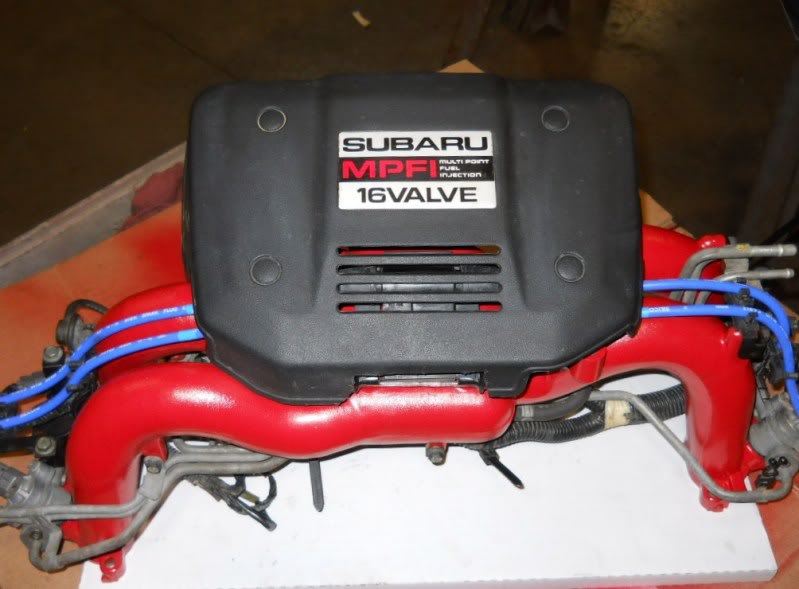
A strange thing happen last night after work…my ea81 grew into an ej22… 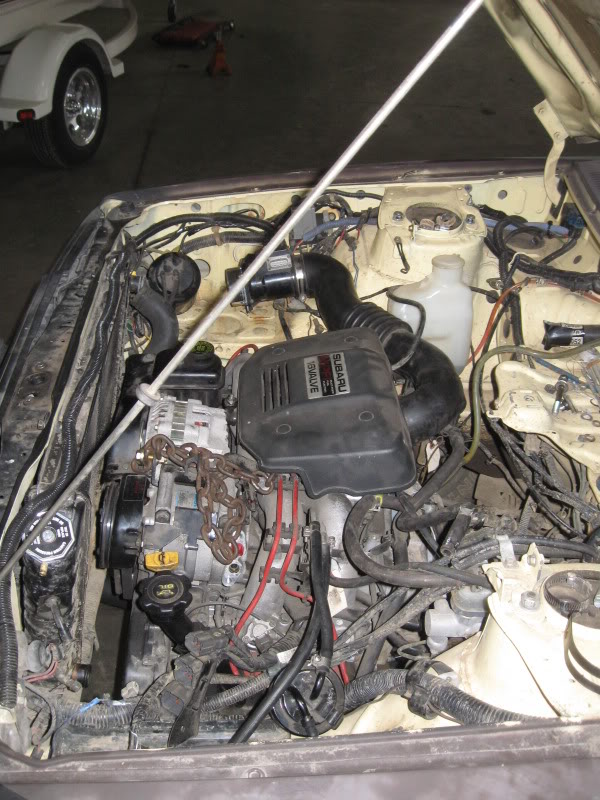
15 November 2009
here’s my MAF adapter from ebay I found for $16 . Since I can’t use the legacy airbox (not enough room) . I will use a 3″ WR V-2 foam cone air filter with my K & N precharger wrap . There is just enough room for the purge canister. 

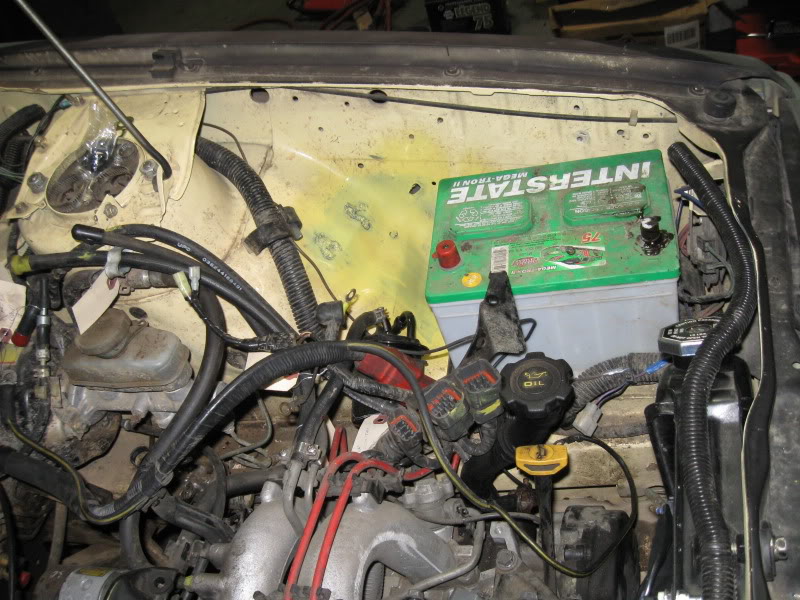
Note: the battery is removed from the passenger side.
The drivers side shows where I removed the jack holder to make room for the battery.

Note the motor mount holes needed to be elongated to the outside as the legacy mounts sit abit farther apart.
The exhuast almost fits . I need to cut and move the cat over about 2″ to the drivers side to clear the x-member/strutbar mounts.
Everything in this swap so far is from upullit or very cheap..
Infact the cone filter I’m going to take from my outback and put the stock airbox on the obw.
I’m even thinking of swapping the Perrin crank pulley from my outback to put on the ej22 (saves 8lbs of weight up front plus the ej22 will crank the rpms faster due less recipricating weight) I love mine..)
16 November 2009
Several hundred dollars under $500 so far…
Keep in mind I have done all my own welding /fab /some machine work my self..(except redrilled flywheel,ea/ej dapter plate.)so that saves alot. Including cutting down my own harness…
Upullit/craigslist/ebay..to get your deals..sometimes usmb..
The power will be nice for sandlake… up passes….(don’t have to rejet carb over 5,000ft)
22 November 2009
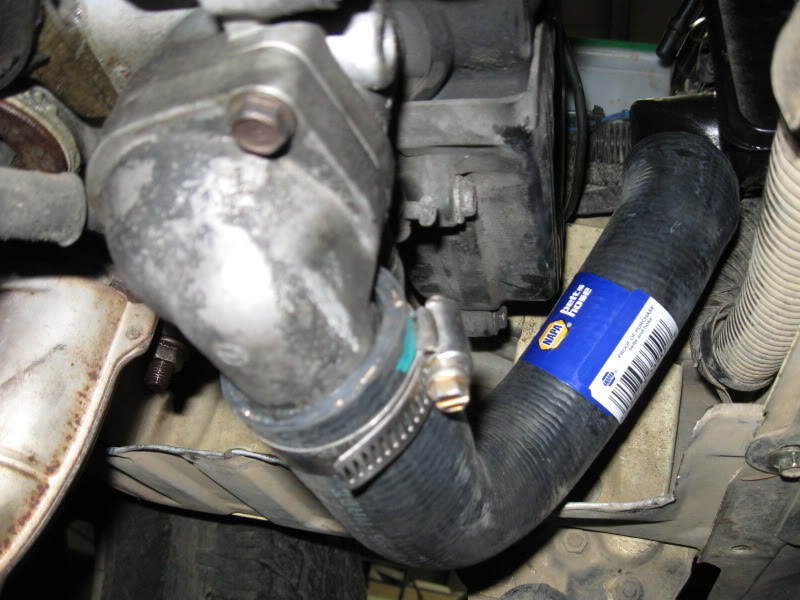
I did abit of thinking about how to route hoses for the ea81 radiator.
First was the 1.5″ inlet/outlets to fit the ej22 hoses.
Next was find the best routing… 90* seemed to be the best setup .
I manged to use the legacy lower radiator hose on the inlet and outlets.
It worked perfect..my cost thru macs radiator was only $98 
Now for the cooling fans I used a 12″ pusher fan on the passenger side and a 12″puller on the divers side (cost $23 ea from ebay).
Note: the removal of the A/C compressor gave me just enough room .
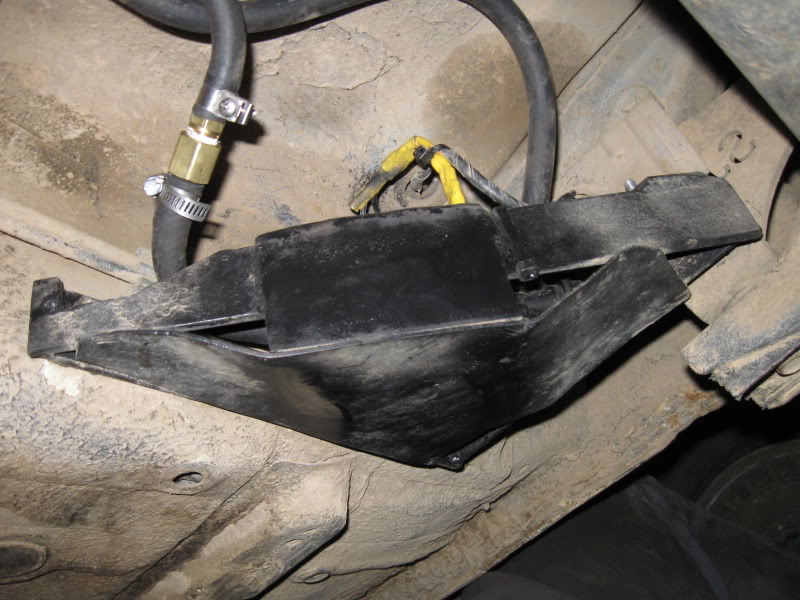
I also cut the radiator support bracket that ran top to bottom for more clearance.
I managed to save and custom cut the splash guards as well.
The battery was relocated to the drivers side.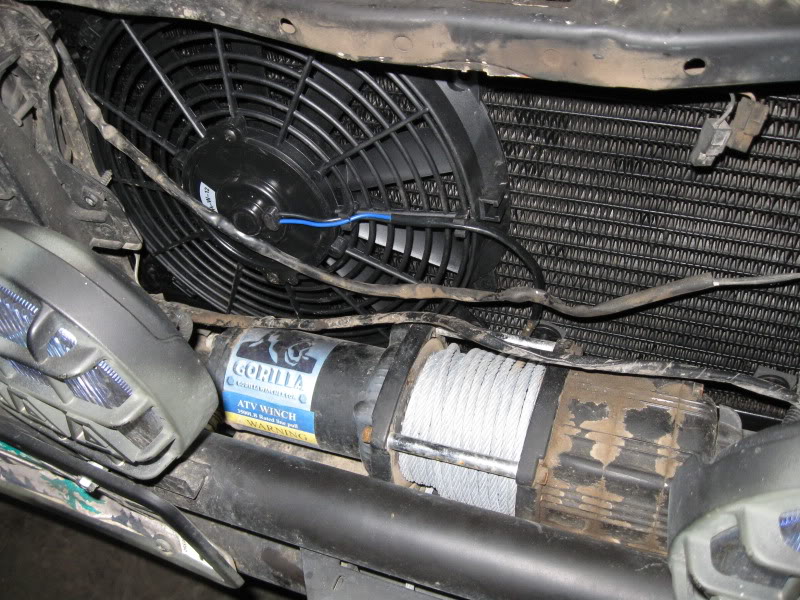

24 November 2009
I’ve got alot to do still… install my clutch/redrilled flywheel when it arrives(pull motor and reinstall),
cut/weld exhaust, O2 sensor
install fuel pump /hoses.
wire in EJ harness,mount ecu
connect a bypass hose for PS pump as I have no PS rack yet….
maf cone filter , mount
purge canister mount/reroute hoses
throttle cable
misc. hoses/wiring
install coolant overflow bottle
replace R.F cv axle
weld in rear axle bump stops @ torsion bar
convert rear cvs to ea82 cups/doj using ea81 shafts
let’s just say I’ll have a full plate over thxgiving…
I hope to be done for the xmas tree run..
25 November 2009
last night I pulled the motor and stuffed the sjr redrilled flywheel/xt-6 clutch..
One less thing to do
26 November 2009
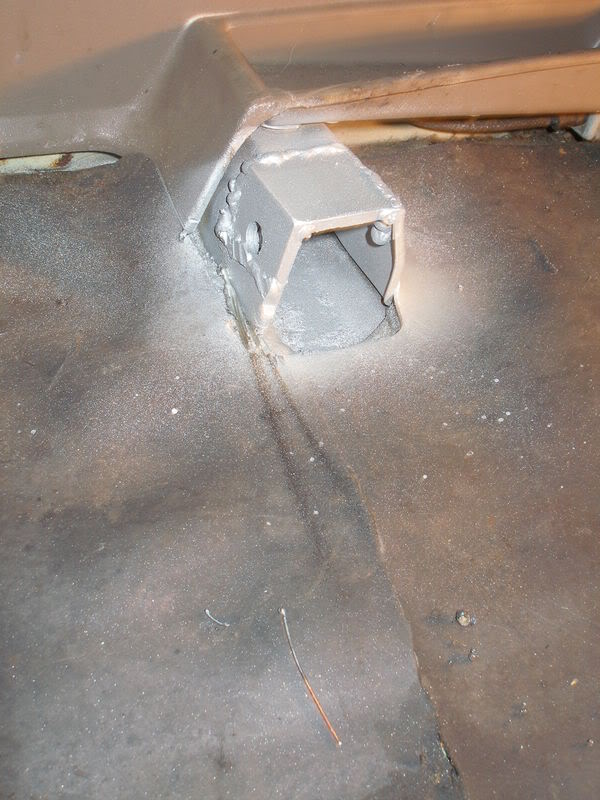
Here’s a bracket I fabbed up for the pitch stopper. 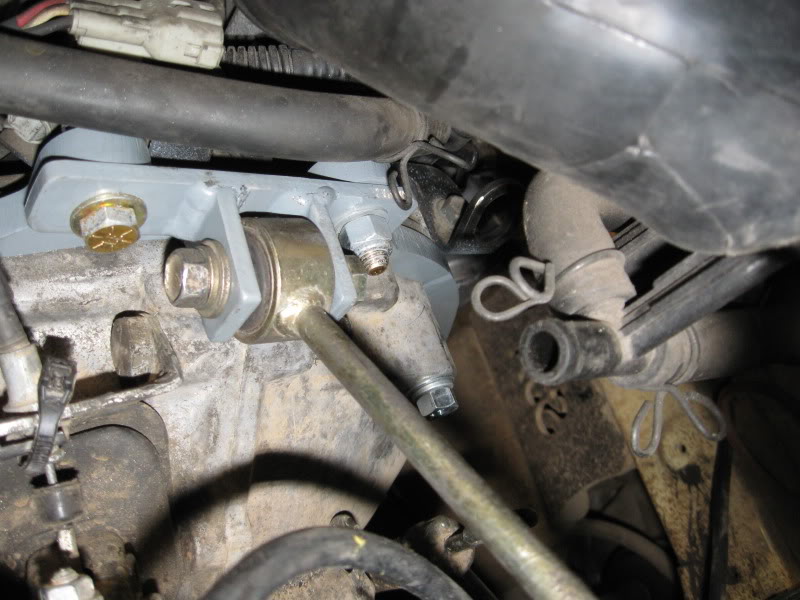 On the ea81 chassis I had to knock out the existing pitch stopper mount shaft . It was offset too far to be effective . So I put a bolt in place and washers/large nut as a spacer to center the mount more to the drivers side..
I had taken an ea82 pitch stopper and cut/welded the end onto my ea81 pitch stopper. 
10 December 2009
so far my b day money went for a Perrin foam air filter as it fits perfect…just enough roam to clear the purge canister…whew..
11 December 2009
very close…but a bbq steak and a bottle of BRRR! was calling me…lol
I did hookup all my grounds….a couple more wires…and I’ll test fire…
Tested the starting system ok..and the fuel pump to prime the system..ok…
here’s my modified gas pedal . I took an ea82 pedal and a ea82 throttle cable(SPFI) . The ea81 pedal is very close so I cut the ea82 end off and welded it on the ea81 pedal. 
here’s a pic of the ea82 starter and legacy heater hoses I cut to fit the ea81. note: I had to bend the ej heater line abit to clear the hill holder.
pic of the ej harness/ fuel filter brackets bolted on.
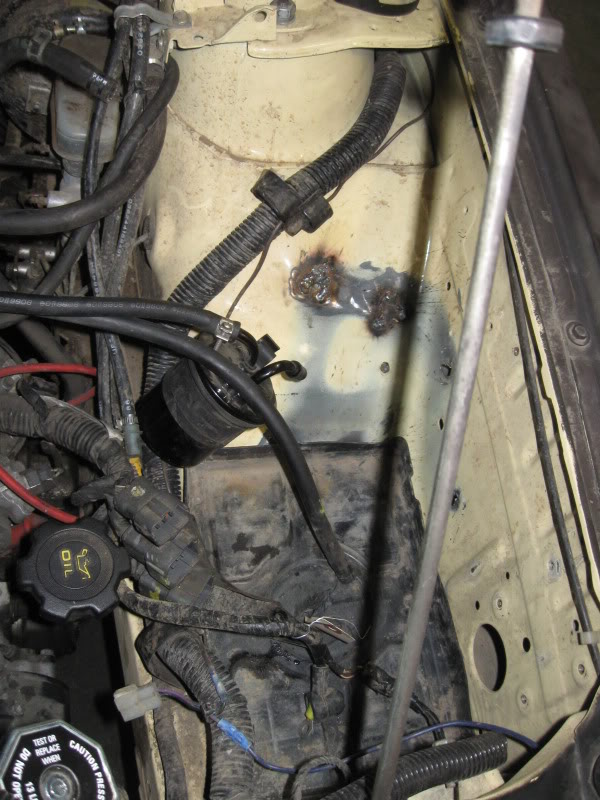
I used an ea82 coolant overflow bottle /bracket. I welded it to the inner fender wall and just fit…even the hose was perfect length..
for the vaccum hose (heater controls) I used a fitting from a wrx turbo and installed it on the maniold.Thx to Cmiller…
[quote name=’RAugur33′]Curious to know why you modified the gas pedal. I used stock ea81 pedal and accelerator cable and it seems to work fine. Anything I should know?
Keep in mind I have a 4″ body lift so the stock ea81 cable was just too short. Also the eyelet for the EJ cable housing was abit big for the ea81 cable(loose fit). The ea82 stuff worked better and less kinking of the cable housing. EA82 parts are easier to find in the junkyards than ea81 so another reason for the swap.
19 December 2009
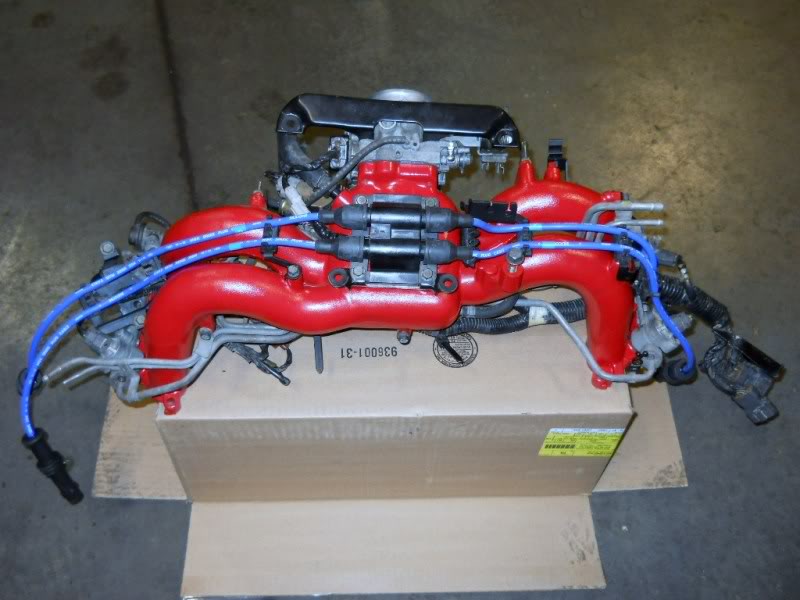
here’s my intake setup..
I used a Perrin foam filter (in conjunction with K&N precharger wrap)that just cleared my purge canister. Mind you I’m not building a bogger so getting water up there is not going to be an issue.. 
Also I welded a bracket to support the intake tube. 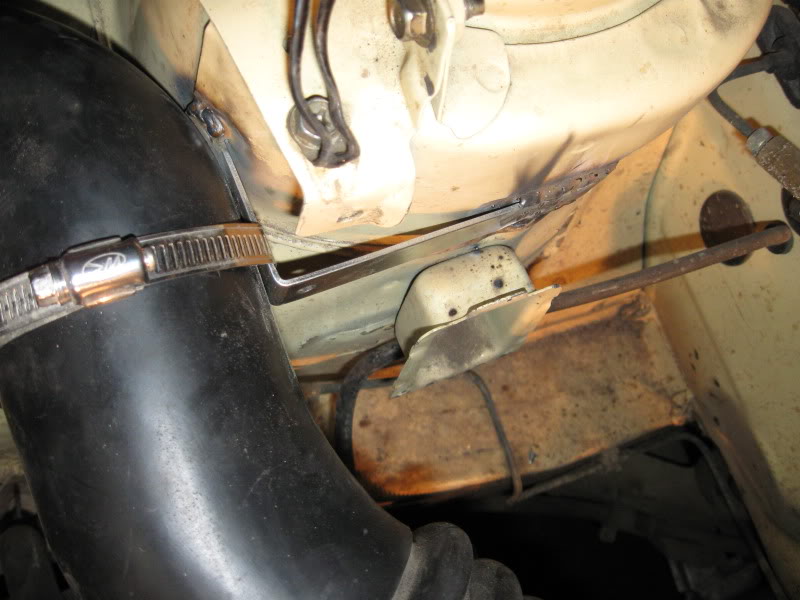
I kept the stock location of the Ea81 electrical wiring . I ran a 10ga neg./possitive wire from the battery to a junction block to power all my existing accessories.. 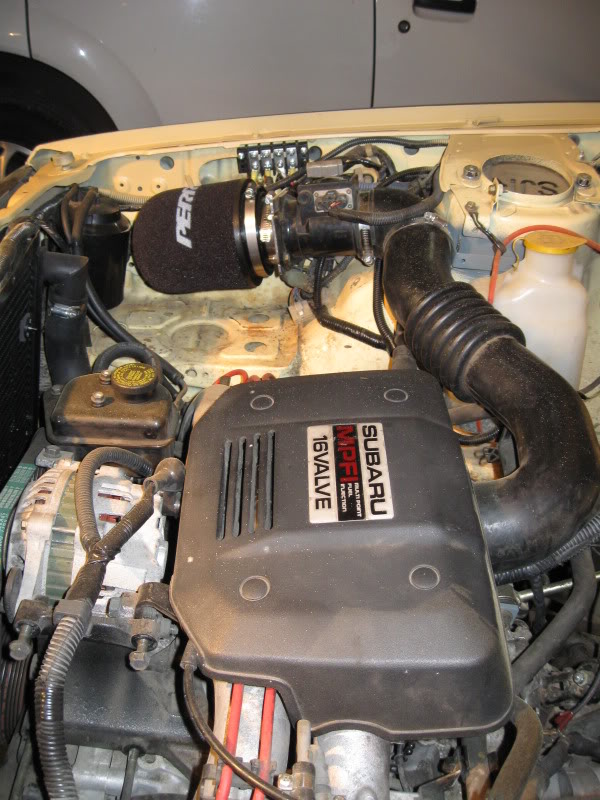
note the camo sand color for the engine bay …so I need to finish that as well.
my ps pump looped until I can finda rack.. 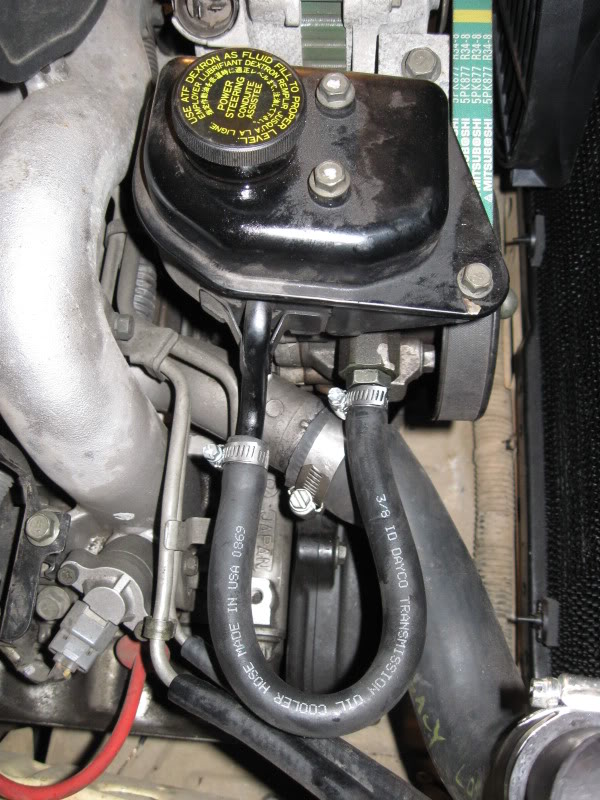
here’s my reworked EJ exhaust less the cat. I used a O2 sensor nut from napa to weld in.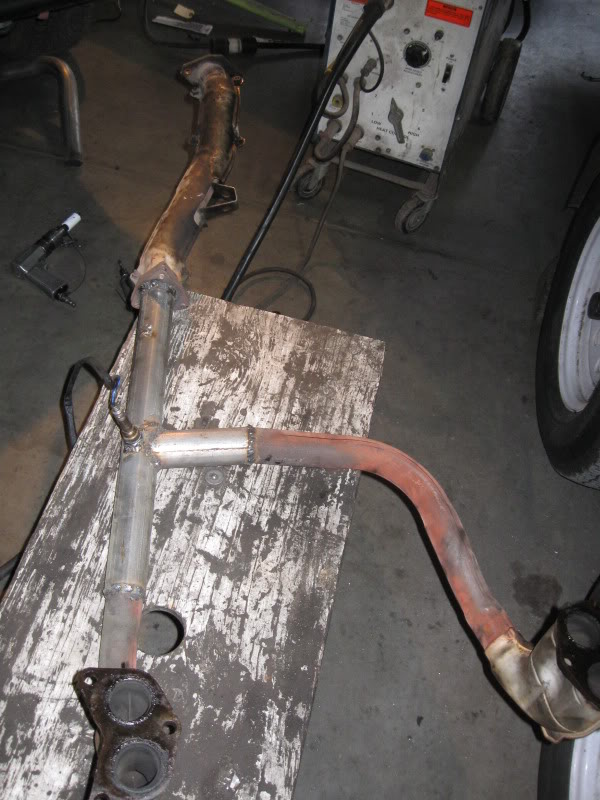
my Ea82 spfi fuel pump /bracket welded into my beefed pump bracket mount(with bash protection.) 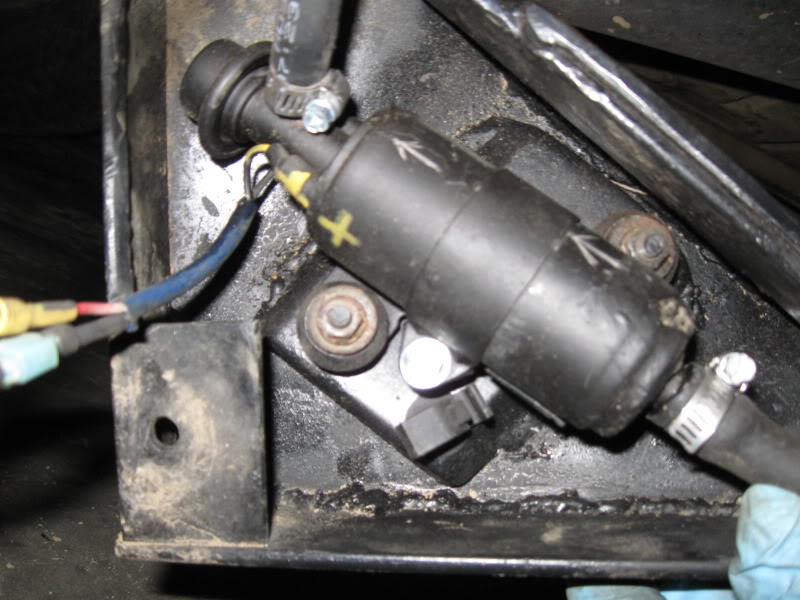
27 December 2009
just got back from California..sunny skies….62…I didn’t wanna come back..
So now I just need to finish wiring up the ECU…
7 January 2010
It runs after abit of careful cut/splicing..a couple hours of studying alldata/haynes manual/numchux write up wiring schematics.
Thx again to cmiller, numbchux(writeup) for their assistance..
I was so busy working ot/holidays.. time for a test run at sand lake…wahoo:banana:
I’ll post up some more pics soon..
11 January 2010
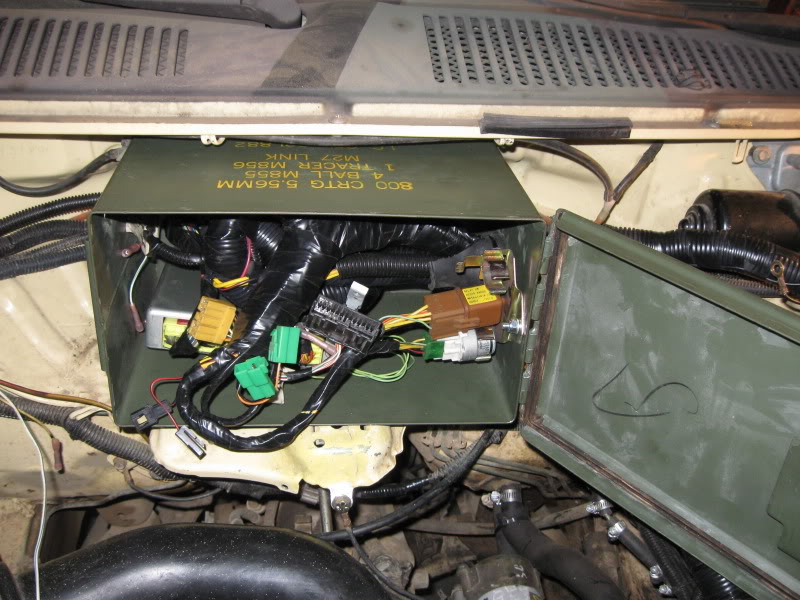
I decided to use an ammo can to house the ecu , ign, fuel pump relays.
Given the EA81 doesn’t allow much space under the dash. I used a grommet from the legacy to run the wires thru the side of the box. A couple of vent holes on each side for ventilation..(this is not a bogger so water is not an issue..) I open the can and easy access for cel/testing. 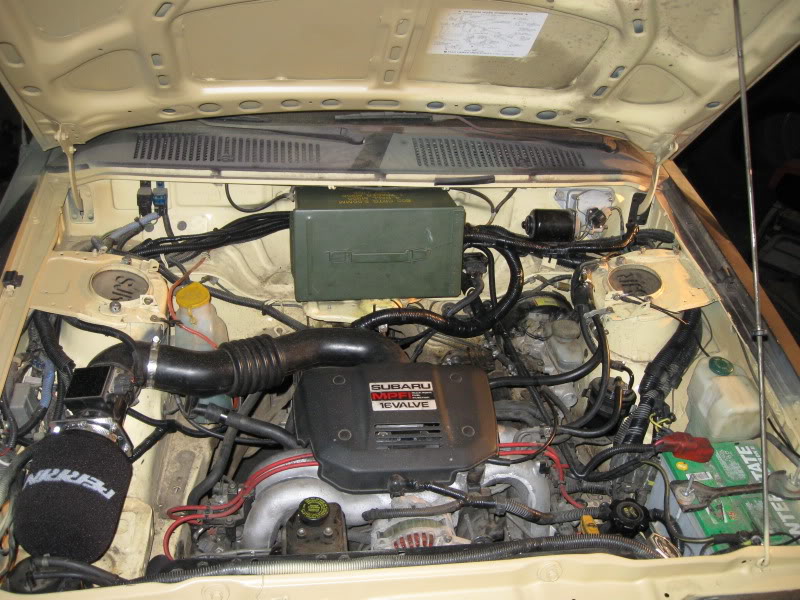

13 January 2010
With the extra weight on my old struts..my front tires rubbed in tight corning…
So I have new struts(adjustable) to install with front ea81 wagon springs as they are abit stiffer. We will see how it goes….
As well as a new set of radius arm bushings installed.
Right now it’s a rocket… and I can break tires loose If I use the skinny pedal too much..
16 January 2010
I stumbled upon a slightly used set of KYB GR-2’s with wagon springs….
for $100 for the pair
There was just abit of surface rust in places…I decided to clean them up in the bead blaster. I painted the struts aircraft flat gray(subes heritage) and the springs flat black.
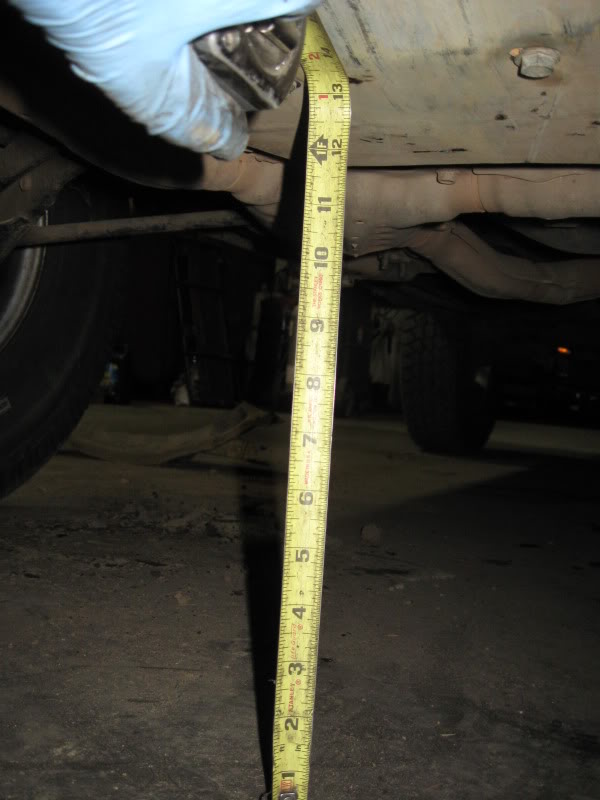
My first measurement was at the top of my bumper @ 26 1/4″ when installed I now have around 28″ whoa…1 3/4″ suspension lift..
We will see how it works..hopefully my cv’s will hold up….otherwise I’ll swap out the wagon springs to the hatch springs.
21 January 2010
here’s a pics of my new kyb gr-2 struts and wagon front springs.. 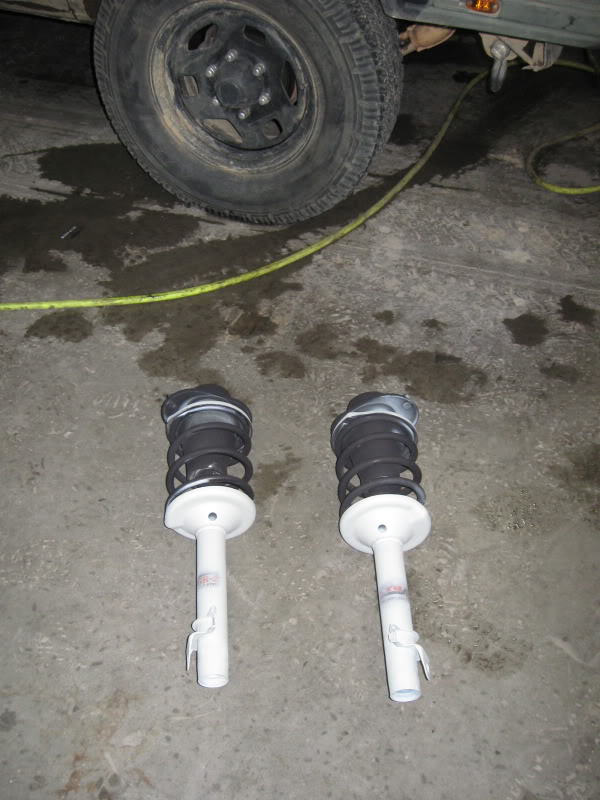
also a abit of stenciling for the rebadging of my gl…
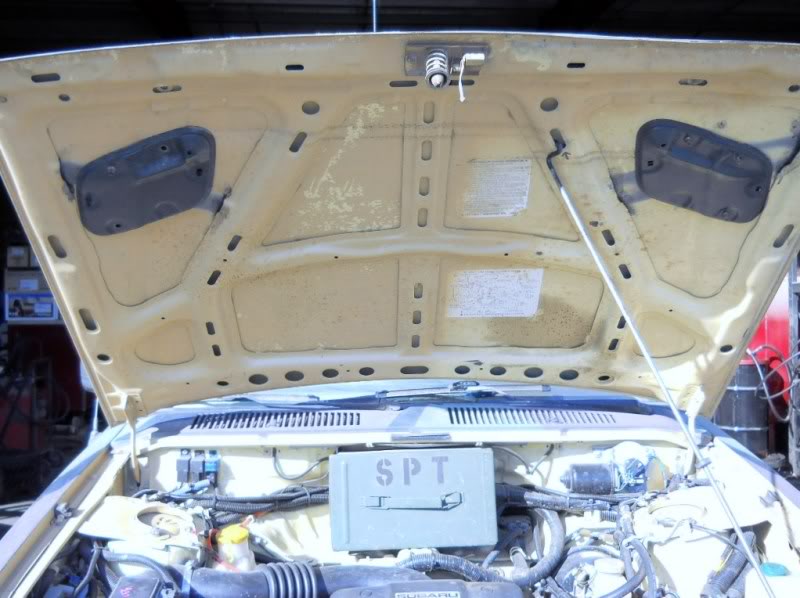
and a little spt on my ammo box.. 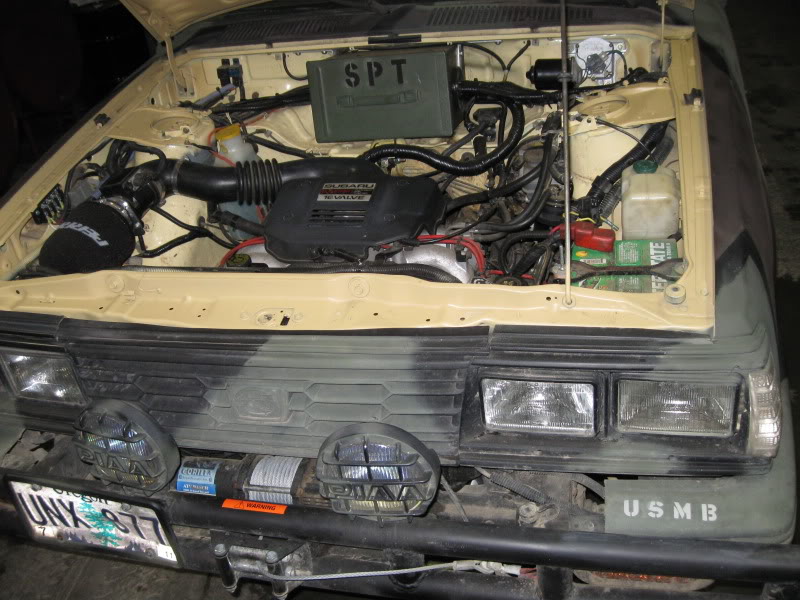
31 January 2010
After days of searching craigslist I stumbled on a set of 4 wild country 235/75R15 TXR studded /siped mud terrains with 80% tread for $100
I about shat myself…so now I have a full matching set of tires…wahoo…!!!
When it’s April I’ll pull the studs out..
Remember this is a budget wheeler…I cannot dump $600-800 in tires for a $250 car.. I’m still under a grand on this whole project…just lot’s of labor..and trips to the junkyards, craigslist finds..
8 February 2010
I picked up some large ammo boxes to organize my stuff better.
Also a harbor frieght heater/defroster $12.99 for the back window as the factory one isn’t working as well.(I’ts the little yellow thing in the corner.
Superbowl sunday I got my wat. temp guage working with a 1/4w 270 ohm resistor. Seems pretty close with the ea81 guage. I verified the temp with a raytech temp gun at the radiator inlet.
I couldn’t help but go wheeling on such a nice day..had to test out the mudterrains.
5 March 2010
So far I’ve got about 23mpg with the new mud terrains on a road trip..not to shabby for a lifted rig..and a bigger motor..
I also purchased a GPS unit . So now I know my actual speed.. my estimations were close..
26 April 2011
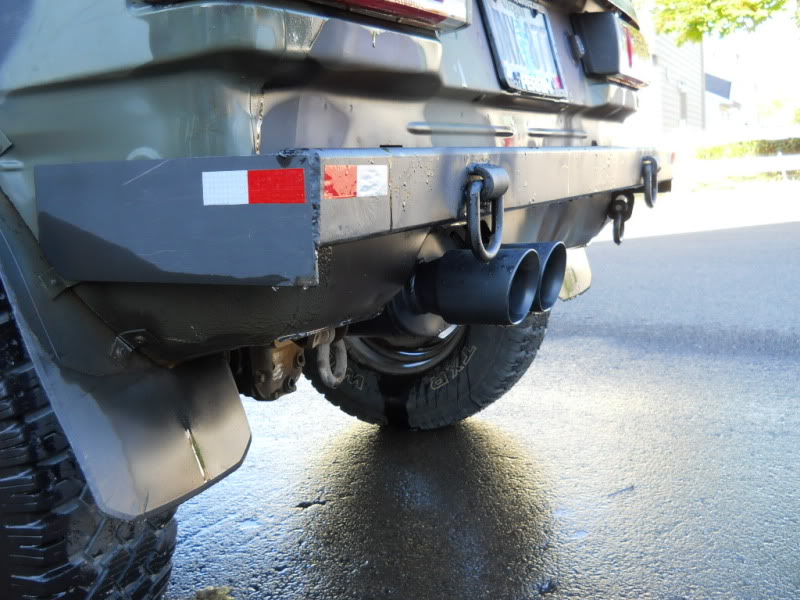
The easter bunny was busy fabbing a rear bumper for my hatch..
I just need to weld on some shackle points, add a led lic. plate lamp, a couple of small flush mount (round) red led markers for the corners. 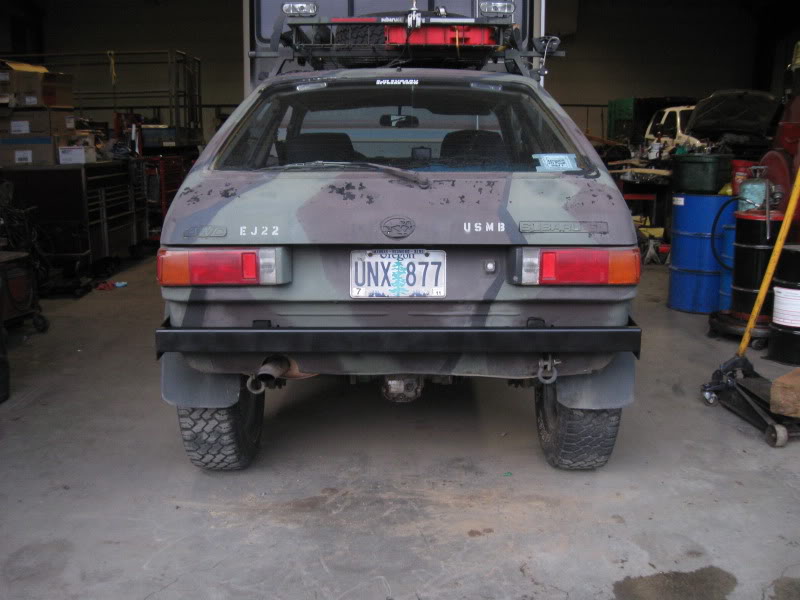
Also a my H6 100amp alternator upgrade was done a few weeks ago here’s the link..
http://www.ultimates…ighlight=100amp
My hatch may not be as nice as the many you’ve had …
Given I’ve only got about $1,300 total investment and alot of blood, sweat…Things have just fallen togother at the right time..
It’s become my daily driver as fuel prices climb…I’m gettin ‘ 25-28mpg If I keep off the skinny pedal..
17 July 2011
I welded on some new D-rings on the rear bumper, dot tape for visability at night. 
I found some power windows and mirrors from an ’82 gl coupe also the upper door cards. 
I used a mirror switch from a legacy and mounted in the drivers speaker grille.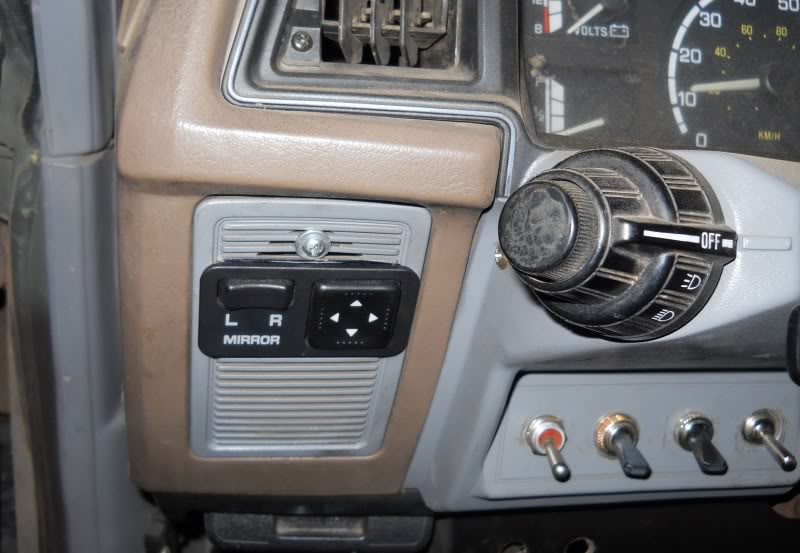
For the passenger window I used the coupes switch and mounted on the ea82 shift console coin holder.
Finally got around to fabbing/welding in some bumpstop pads/towers on the rear suspension . a dirty shot..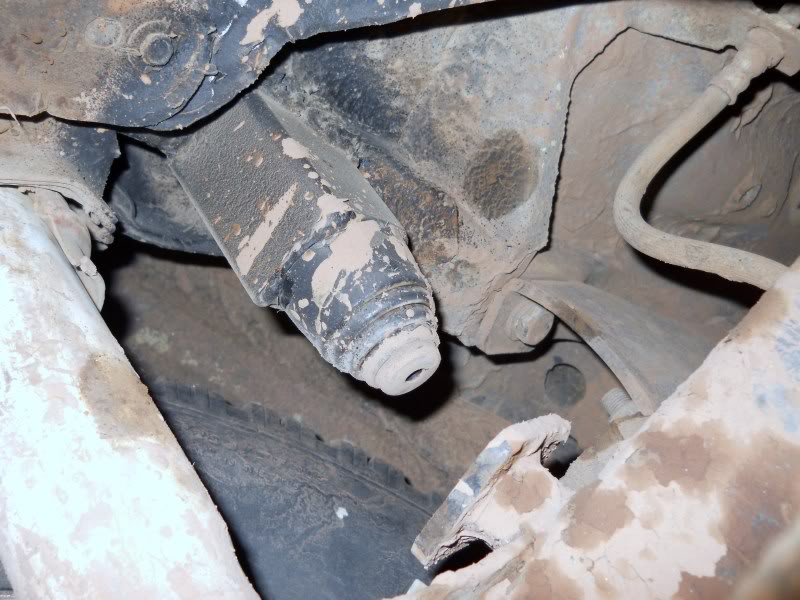
22 July 2011
My gl went under the knife(die grinder/air saw)…
I decided to give the hood some vents from a ’98 rs hood vents with block off plates. With all that ej heat pent up under.. let her breathe abit…
I also plan to get another set of block of plates for summer use with functional cutouts. 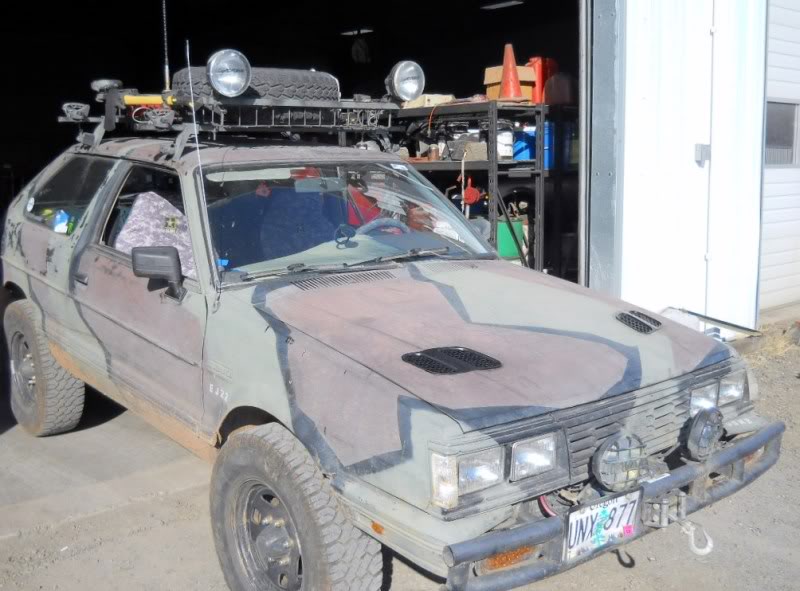
Given the ea81 body has a much smaller engine bay than an impreza or ea82 body. Heat tends to build up with no where to go. Keep in mind I have a stock ea81 radiator…!
Cooling is fine when cruising …However, on those hi altitude long steep climbs…even the ej is working hard up the steeps to turn those big tires…
The backing plate will help support the hood where I cut out the old supports too. They are essential for mounting and they are contoured to fit the fold in the hood.
17 August 2011
hood vent pics.. drilled out 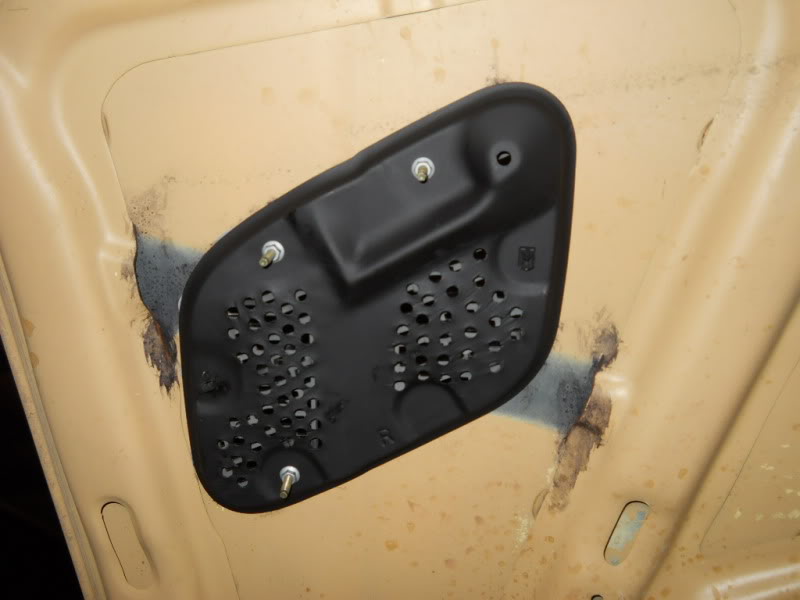
The vents made a significant drop in wat. temp…5 degrees or better at 5,000 plus feet.
I also added some led marker lights drilled/fitted in the rear side marker lens ..they are really bright..
I finally got around to painting the dash, horn buttopn charcoal grey to match the rest with vinyl paint.
Alot less glare with flatter darker color…!
I also fitted the remote drivers mirror and Powered window switch in the door panel..
22 August 2011
AS WCSS13 is this weekend I have even more last minute stuff to do..
A quick oil change with full synthetic oil. New O2 sensor..
I went out to the Perrin air show…picked up a few goodies…
Installed a Perrin crank pulley…
A “mini cooper ” Alta r56 muffler…Which should give my sube a better sound.. vs my cheepo muffler I put on when I had the ea81 in it.
http://www.brrperfor…r-mini-alt-0003
I paid an obscene price for it..$30…and about shat myself ..when I found out the retail…It’s black too!
I have to install the drivers side power window regulator and wiring, Plus wiring for the power mirrors.
So much to do.. so little time…
26 August 2011
I need a resonator….It’s tad too loud… .but sounds badass ..
WOT It’s scary in first gear…I gained another 10-12hp..tires are squeali’n
Mind you I still have manual steering…Fighting that torque steer…Whoa…!
It sounds more like a rally car now…and the dual tip and low rumble is just mean…
single best $30 upgrade yet….wahoo…
Lucky 13(wcss13) this weekend…!
30 August 2011
Muffler pics.. 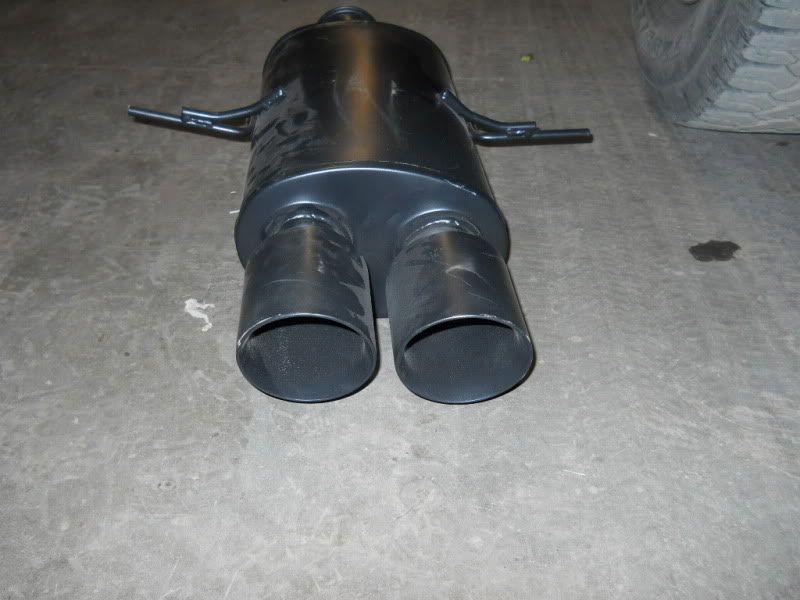

perrin pulley installed just in time for the WCSS13
 29 October 2011
I was driving home from Mt.Hood rally last sat. only a few miles from home …I noticed alot of oil burning..
The plume out the exhuast was like a james bond getaway…
I burned a quart in about 7miles..!
Did a compression chk. #4 cyl was 30psi…The tired old ej22 with about 180k on it ..
So for $200 and 2yrs and 10k of hard driving on a used motor I can’t complain..
So the today the motor came out…time for a rebuild…
1 November 2011
We were there for the first stage only and then drove lolo pass over to a friends in Sandy.
The tear down begins on my ej22..
2 November 2011
I tore down to the block , Heads looked good. Good cross hatch in the cyl. bores. When I took the oil pan off I discovered pieces of ring land and broken rings from #4 cyl.
Tommorow I will split the case…..
4 November 2011
Here’s a few pics of the tear down…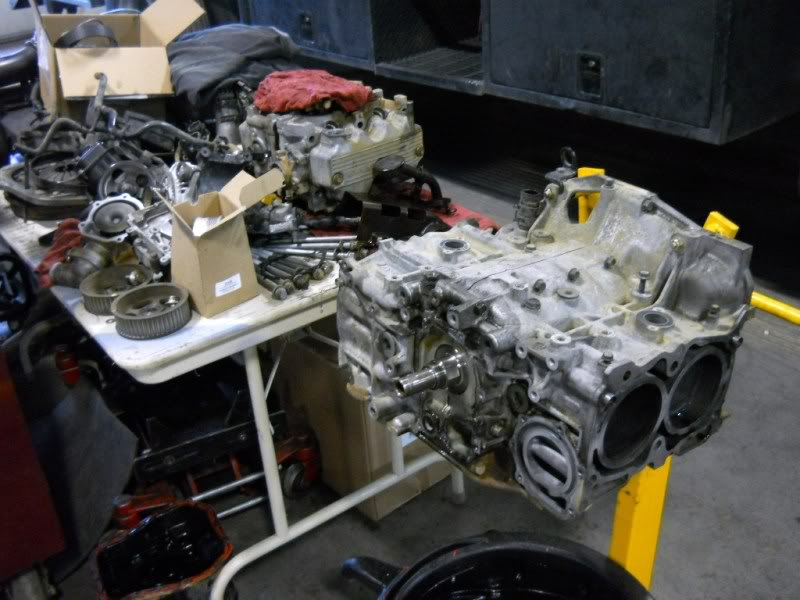
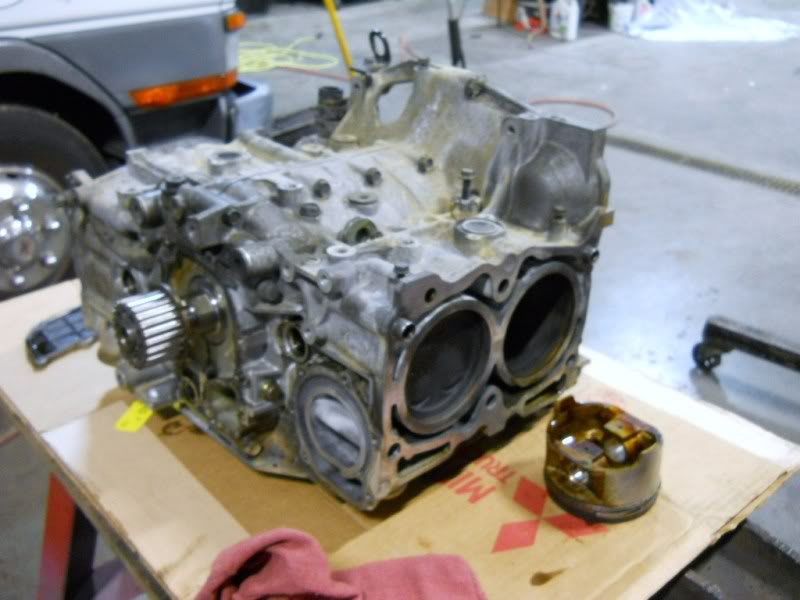
what I found in the oil pan. Ring bits and a piston piece that was on the bottom.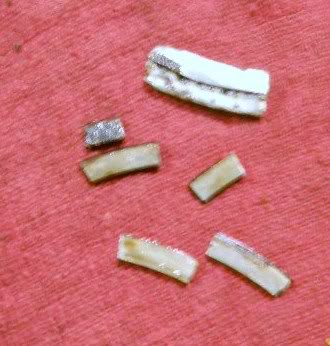
#4 Piston
note: the piece under the piston missing 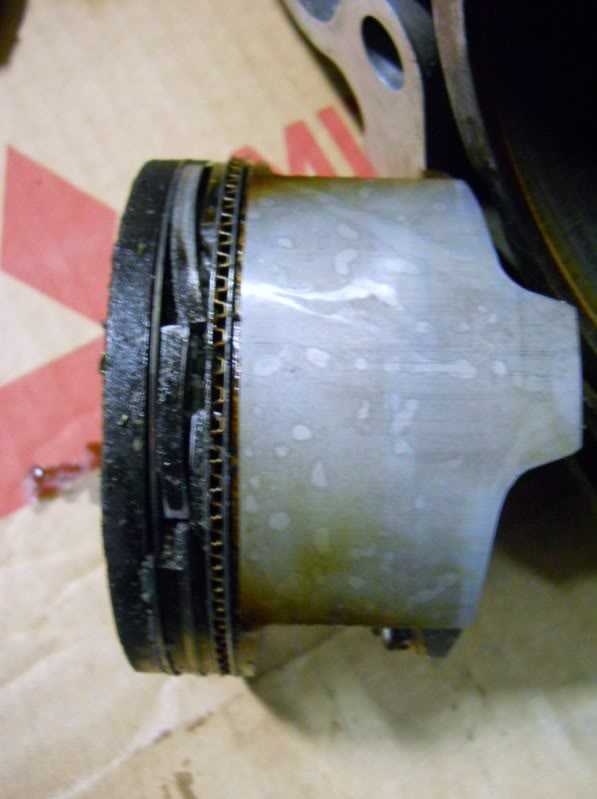
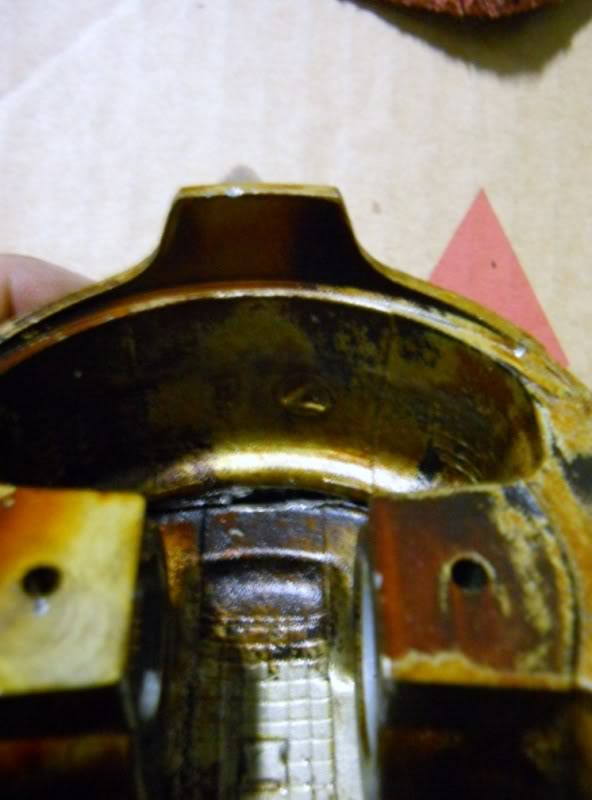
wrist pin removal tool I fabbed( I used a socket like a slide hammer) 
lots of good cross hatch in the bore….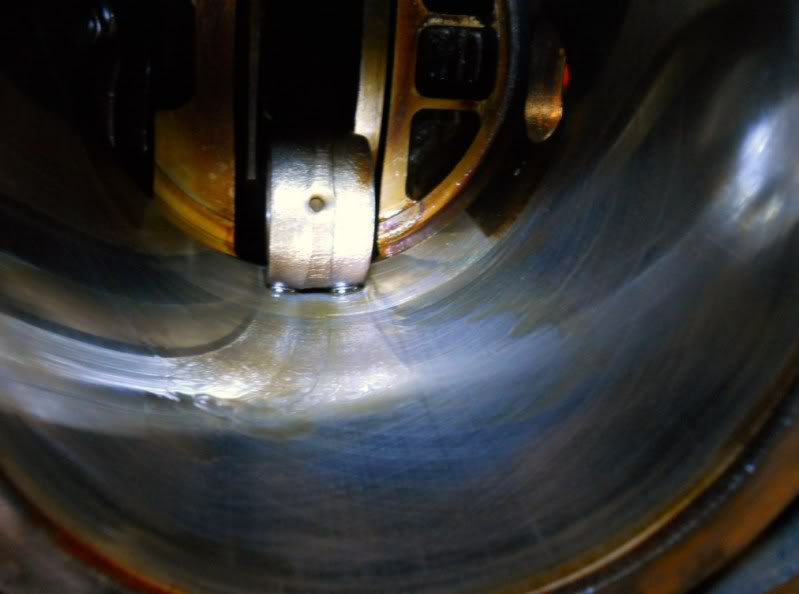
8 November 2011
I got one of only 2 “A” left pistons in the country! Rings are on their way.
Just a rering and #4 piston, valve stem seals, gaskets, water pump.
9 November 2011
I was thinking of painting the intake manifold StI red or black.
I have blue ign wires now…so contrast would be kewl..
The engine bay is yellow so I’m leaning towards red..
13 November 2011
After abit of bead blasting I used a ford red engine paint. Intalled the new blue NGK plug wires, pcv valve. Cleaned up the TB(new gasket).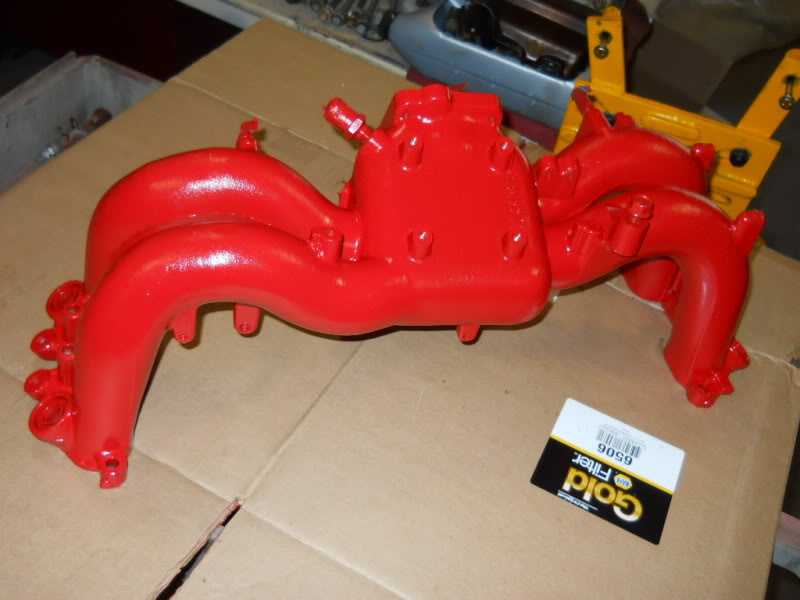
29 November 2011 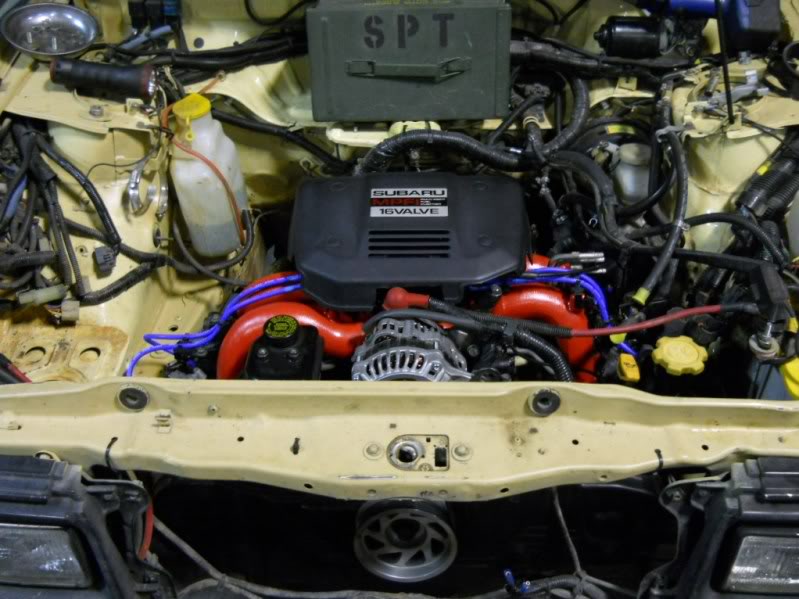
11 February 2012
I’M always looking for more space for the longer roads trips.
Where to put firewood, a place to sit, table, beer holder…etc…?
I welded on a 2″ receiver to the rear bumper . Keeping it low profile for maximum departure clearance.
Drop and go wheelin’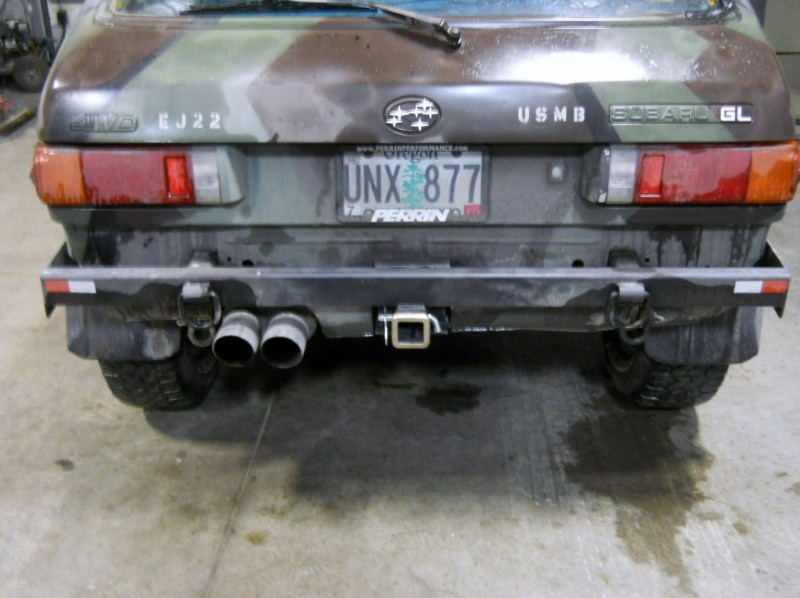

28 February 2012
I got some cheap ebay projector headlamps (h4) for $28
plus they have a blue 194 marker which is kewl..
Team cf gave me the hella wiring conversion connectors..
5 December 2012
Little update to continue this thread being the new owner of legendary Scooby Climbs 84′ Subaru GL…
I went with the:
K&N Apollo Cold Air Intake Systems Universal
&
Stone For 96-03 Toyota 90 series Landcruiser Prado Snorkel Air Intake Snorkeling
Most challenging part was getting everything to fit and find the proper adapters, but I found some at the local hardware store and in my tool box.
Also had to reroute one of the hoses from the idle control valve and had to relocate one of the plastic fittings on the intake piping.
They say that the intake head is designed to be in forward position with escape channels that the ram air forces the dissipated water particles to drain from, but I don’t trust it and drive with it faced aft just in case. Other wise, I have not integrated a drain hole yet. As long as I periodically clean the air filter it should be fine.
Anyways enjoy the pictures!
Bryan
13 March 2013
For those wondering why I sold my beloved hatchie..
It came down to safety with my son riding in the back.
As well as needing space for multi day wheel in trips.
Bryan is a good friend and was the perfect candidate for sharing the love of the hatchie.
In fact he got his first taste of wheelin in it.
Ride on…